
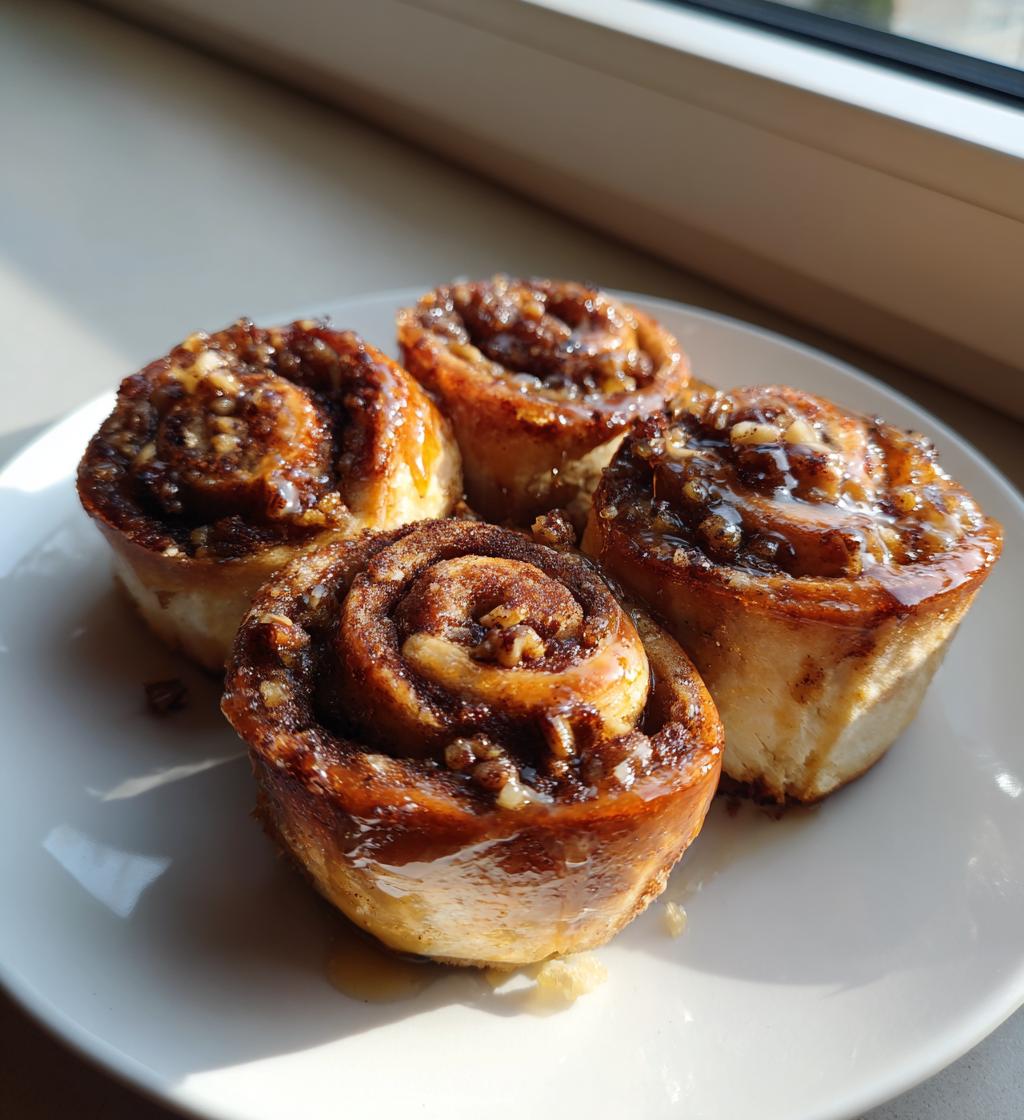
Oh, you have to try these vosi hnizda! My Slovak grandmother used to make these sweet little „bird’s nest” pastries every holiday, and I still get giddy when that honey-walnut aroma fills the kitchen. They look fancy with their swirly nest shape, but trust me – the dough comes together in minutes, and the filling? Just walnuts, honey, and a kiss of cinnamon. It’s that magical combo of crispy layers and gooey center that makes everyone at my table suddenly „not hungry” but somehow devours three each. Let me show you how simple Slovak baking magic can be!
Why You’ll Love This Vosi Hnizda Recept
- Traditional taste with a story – Every bite takes you straight to a Slovak kitchen, where these pastries have been loved for generations.
- Simple, pantry-friendly ingredients – Flour, butter, walnuts, honey… that’s it! No fancy stuff needed.
- Looks way harder than it is – Those gorgeous swirls? Just roll and tuck—I promise it’s not as tricky as it seems.
- Customizable fillings – Swap walnuts for poppy seeds, or add a dash of orange zest to the honey. Make it yours!
- Perfect for sharing (or not) – They’re so pretty on a dessert tray, but I won’t judge if you hide a few for yourself.
- Smells like heaven baking – That cinnamon-honey aroma? Pure comfort.
- Great for beginners – If you can roll out dough, you’ve got this. My first attempt was messy but still delicious!
Ingredients for Vosi Hnizda Recept
(Tip: Measure everything before starting – it makes the process so much smoother!)
- 500g all-purpose flour (sifted – no lumps means a silky dough)
- 250ml whole milk (warmed slightly – just finger-warm, not hot)
- 100g unsalted butter (melted and cooled a bit – I zap it in 10-second bursts)
- 1 large egg (room temperature – takes about 30 minutes out of the fridge)
- 1 tbsp sugar (regular granulated – just enough sweetness for the dough)
- 1 pinch salt (balances all that honey goodness)
- 200g ground walnuts (finely ground – I pulse them in my food processor)
- 150g honey (use good quality – the flavor really shines through)
- 1 tsp cinnamon (ground – freshly ground if you’re feeling fancy)
Note: My grandma always used her hands to measure walnuts („about two handfuls”), but I’ve converted it to grams for precision. Old recipes meet modern baking!
Equipment Needed for Vosi Hnizda Recept
Don’t worry—you don’t need any fancy gadgets for these! Just grab these basics (I bet you already have most of them):
- Rolling pin – The trusty wooden one my grandma gave me works best, but any will do. If you’re in a pinch, a wine bottle works in a pinch (washed and dried, of course!).
- Mixing bowls – One for the dough, one for the filling. I use my biggest ceramic bowl because I always end up flinging flour everywhere.
- Baking sheet – No special pan needed—just a standard sheet. Line it with parchment paper to save your sanity during cleanup.
- Parchment paper – Non-negotiable! It keeps the nests from sticking and makes transferring them a breeze.
- Pastry brush – For brushing melted butter on the dough (optional but adds that golden shine). No brush? Your (clean) fingers work too.
- Sharp knife or pizza cutter – For trimming dough edges. I’ve used a butter knife in desperation—it works, just not as neatly.
Pro tip: Clear your counter space before starting. You’ll need room to roll out those dough circles—trust me, I’ve learned the hard way after knocking over a spice jar mid-roll!
How to Make Vosi Hnizda Recept Step-by-Step
Okay, let’s get our hands doughy! I promise this isn’t as intimidating as it looks—just take it one step at a time. The key is rolling the dough thin (think „almost see-through”) and not overstuffing those nests. Here’s exactly how I make mine, with all the little tricks I’ve picked up over the years.
Preparing the Dough
- Mix the wet ingredients: In a large bowl, whisk together the warmed milk, melted butter, egg, sugar, and salt until it looks like a pale yellow soup. Don’t stress about lumps—they’ll disappear when we add the flour.
- Add the flour gradually: Start with half the sifted flour, mixing with a wooden spoon (or your hands—I always end up using my hands!). Add the rest bit by bit until the dough pulls away from the bowl. It should feel soft but not sticky—like a baby’s cheek!
- Knead briefly: Turn it onto a floured surface and knead for just 1-2 minutes until smooth. Overworking makes tough dough, so stop when it’s uniform. No resting needed—we’re rolling immediately!
My grandma’s trick: If the dough feels too sticky, add flour 1 tbsp at a time. Too dry? Dab your fingers with milk and knead it in. Dough is forgiving—you’ve got this!
Making the Walnut-Honey Filling
- Combine dry ingredients: In a separate bowl, mix the ground walnuts and cinnamon. Breaking up any walnut clumps now means smoother filling later.
- Add the honey: Pour in the honey and stir with a fork until every crumb is coated. It’ll look like wet sand at first—keep mixing! If your honey is super thick, warm it slightly (10 seconds in the microwave does the trick).
- Test the texture: Pinch some between your fingers—it should hold together but not drip. Too runny? Add a spoonful more walnuts. Too dry? A teaspoon of milk or more honey helps.
Warning: You’ll want to eat this filling straight from the bowl (I always do). Resist! Save it for those beautiful nests.
Shaping and Baking Vosi Hnizda
- Preheat and prep: Crank your oven to 180°C (350°F) and line your baking sheet with parchment paper. No greasing needed—the butter in the dough does the work!
- Divide and roll: Split the dough into 12 equal pieces (I eyeball it—perfection is overrated). Roll each into a ball, then flatten into a circle on a floured surface. Roll it thin—about 2mm thick, like a crepe. Thinner dough = crispier layers!
- Spread the filling: Leave a 1cm bare edge around your circle. Spoon 1-2 tbsp of filling, spreading it evenly. Less is more here—overfilling makes messy nests.
- Roll and shape: Gently roll the circle into a log (like a skinny cinnamon roll), then coil the ends inward to form a nest. Don’t stress about perfection—rustic looks charming! Pinch any cracks to seal.
- Bake: Arrange nests 5cm apart on the sheet. Bake for 20-25 minutes until golden brown. They’ll puff up slightly—that’s the honey doing its magic!
- Cool completely: Transfer to a rack immediately (they crisp up as they cool). Wait at least 15 minutes before eating—that honey filling is molten lava hot!
Pro tip: If your nests uncoil during baking, just press them back into shape with a spoon while still warm. They’ll set as they cool—no one will know!
Tips for Perfect Vosi Hnizda Recept
After making these more times than I can count (and yes, a few flops along the way), here are my foolproof tricks for vosi hnizda that’ll make you look like a Slovak baking pro:
- Less filling is more – I know, that walnut-honey mix is irresistible, but overstuffing makes the nests burst open during baking. Aim for about 1½ tablespoons per circle—it spreads farther than you think!
- Seal those edges like a love letter – After rolling into logs, pinch the seam and ends tightly. If honey leaks out, it caramelizes and sticks to the pan (delicious but messy). A dab of water on your fingertip helps seal stubborn spots.
- Oven thermometer = secret weapon – These need steady heat. If your oven runs hot, the nests brown too fast before the inside cooks. Mine’s off by 15°C—worth checking if batches burn unevenly.
- Roll dough thin enough to read through – Seriously, hold it up to a window! Thick dough stays chewy instead of getting that perfect crispiness. If it resists rolling, let it rest 5 minutes to relax the gluten.
- Rotate the baking sheet halfway – Most ovens have hot spots. Swapping front to back ensures even golden color. I set a timer at 10 minutes so I don’t forget (…again).
Bonus confession: My first batch looked like abstract art—misshapen but still delicious! Even “ugly” vosi hnizda taste amazing, so don’t sweat the small stuff.
Variations and Substitutions
One of the best things about vosi hnizda? You can tweak them a dozen ways and still end up with something delicious. Here are my favorite twists—some from family experiments, others from „oops, I’m out of that ingredient” moments that turned out great!
- Poppy seed magic – Swap walnuts for ground poppy seeds (use about 175g since they’re denser). My aunt adds a splash of rum to the filling—it’s *chef’s kiss*.
- Maple instead of honey – Ran out of honey once and used maple syrup. The flavor’s deeper, almost caramel-like. Reduce to 120g since it’s thinner.
- Nut-free version – Toasted breadcrumbs (yes, really!) mixed with cinnamon and honey give that same crunchy texture. My cousin’s kids go nuts for it (pun intended).
- Gluten-free dough – Use a 1:1 GF flour blend. Add ½ tsp xanthan gum if your mix doesn’t have it—helps the dough roll without cracking.
- Citrus zing – Grate orange or lemon zest into the filling. It cuts through the sweetness beautifully. (Grandma would raise an eyebrow, but I do it anyway.)
- Chocolate twist – Stir 2 tbsp cocoa powder into the walnut mix for a Nutella-esque vibe. Not traditional, but who’s complaining about chocolate?
- Savory surprise – Skip the sugar, add grated cheese and herbs to the dough. Fill with mashed potatoes and bacon. Sounds weird, tastes like heaven.
Pro tip: Whatever you substitute, keep the filling’s texture in mind—it should be spreadable but not runny. Adjust with extra nuts or a sprinkle of flour if needed.
Serving and Storing Vosi Hnizda
Now for the best part—eating these golden beauties! Here’s how I serve and keep them fresh (though let’s be real, they rarely last long in my house).
- Dust with powdered sugar – Just before serving, I give them a snowy sprinkle. It’s pretty and adds a touch more sweetness. Use a fine sieve so it looks elegant, not clumpy.
- Pair with coffee or tea – The honey-walnut flavor sings alongside a strong black coffee or herbal tea. My grandma always served them with chamomile—it’s a nostalgic combo for me.
- Room temp is best – Unlike some pastries, these taste perfect at room temperature. The honey softens slightly, making the layers tender but still crisp.
- Store airtight for 3 days – Layer them in a container with parchment between nests so they don’t stick. A cookie tin works great if you’ve got one!
- Freeze for later cravings – Wrap each cooled nest tightly in plastic, then freeze in a bag for up to 2 months. Thaw at room temperature—they’ll taste freshly baked.
- Revive if stale – Accidentally left them out overnight? A quick 5-minute warm-up in a 160°C oven brings back the crispiness.
Confession: I’ve been known to sneak a frozen one straight from the freezer. The honey gets chewy like candy—don’t knock it till you try it!
Nutritional Information
Estimates per serving. Values vary based on ingredients.
- Calories: 250
- Fat: 12g (4g saturated, 6g unsaturated)
- Carbohydrates: 30g
- Fiber: 2g
- Sugar: 15g
- Protein: 5g
- Sodium: 50mg
- Cholesterol: 30mg
Note: These are based on my classic walnut-honey version. Swapping ingredients (like using maple syrup or poppy seeds) will tweak the numbers slightly—but hey, life’s too short to stress over a few calories when dessert’s this good!
Frequently Asked Questions
Can I use other nuts besides walnuts?
Absolutely! Almonds, pecans, or hazelnuts work beautifully—just grind them finely. My neighbor uses a mix of walnuts and almonds, and it’s divine. If you’re allergic, try toasted sunflower seeds for a similar crunch.
How thin should I roll the dough?
Think „windowpane thin”—you should almost see your fingers through it! About 2mm thick is perfect. Thinner = crispier layers. If it keeps shrinking back, let it rest 5 minutes—gluten just needs a little nap.
Can I make vosi hnizda ahead of time?
Yes! They’re actually better the next day as the flavors meld. Assemble and bake, then store airtight at room temp for up to 2 days. Or freeze unbaked nests on a tray before wrapping—just add 2-3 extra minutes to baking time straight from the freezer.
Why did my nests uncoil during baking?
Happens to me too if I rush! The key is pinching the ends tightly and using just enough filling. If they unravel, gently reshape them with a spoon while still warm—they’ll set as they cool.
What’s the best way to grind walnuts for the filling?
Pulse them in a food processor until fine but not pasty (about 15 seconds). No processor? Seal nuts in a bag and roll with a rolling pin—therapeutic and effective! Just watch for rogue walnut pieces flying across the kitchen.
Can kids help make these?
Totally! My nieces love rolling dough and shaping nests (messy but fun). Little hands are great at brushing butter or sprinkling cinnamon. Just supervise near the oven—that honey filling gets hot!
Are these similar to strudel?
Kinda! Both have thin dough and sweet fillings, but vosi hnizda’s nest shape makes them unique. Strudel is flakier (phyllo dough), while these are more tender-crisp. Try both and decide your favorite—I refuse to choose!
Why are mine browning unevenly?
Ovens can be sneaky. Rotate the tray halfway through baking, and if the tops brown too fast, tent loosely with foil. Also, check your oven temp with a thermometer—mine lies by 10 degrees!
Can I use store-bought dough?
Purists might gasp, but yes—puff pastry works in a pinch. Roll it thinner, fill sparingly, and reduce baking time by 5 minutes. It won’t taste *exactly* the same, but it’s still delicious when you’re short on time.
What’s the secret to authentic Slovak flavor?
Good honey and freshly ground cinnamon make all the difference. My grandma always said, „If your honey tastes like flowers, your nests will sing.” Poetic, but true—splurge on quality ingredients here.

Irresistible Vosi Hnizda Recept with 5 Secret Tips
- Total Time: 55 minutes
- Yield: 12 servings 1x
- Diet: Vegetarian
Description
A traditional Slovak dessert made with thin layers of dough and sweet filling.
Ingredients
- 500g all-purpose flour
- 250ml milk
- 100g butter
- 1 egg
- 1 tbsp sugar
- 1 pinch salt
- 200g ground walnuts
- 150g honey
- 1 tsp cinnamon
Instructions
- Mix flour, milk, butter, egg, sugar, and salt to form a smooth dough.
- Divide the dough into small balls and roll each into a thin circle.
- Combine walnuts, honey, and cinnamon for the filling.
- Spread the filling evenly over each dough circle.
- Roll the dough into a log and shape it into a nest.
- Bake at 180°C for 20-25 minutes until golden brown.
- Let cool before serving.
Notes
- You can substitute walnuts with poppy seeds or other nuts.
- Store in an airtight container for up to 3 days.
- Prep Time: 30 minutes
- Cook Time: 25 minutes
- Category: Dessert
- Method: Baking
- Cuisine: Slovak
Nutrition
- Serving Size: 1 piece
- Calories: 250
- Sugar: 15g
- Sodium: 50mg
- Fat: 12g
- Saturated Fat: 4g
- Unsaturated Fat: 6g
- Trans Fat: 0g
- Carbohydrates: 30g
- Fiber: 2g
- Protein: 5g
- Cholesterol: 30mg
Keywords: vosi hnizda, Slovak dessert, walnut pastry, honey pastry