
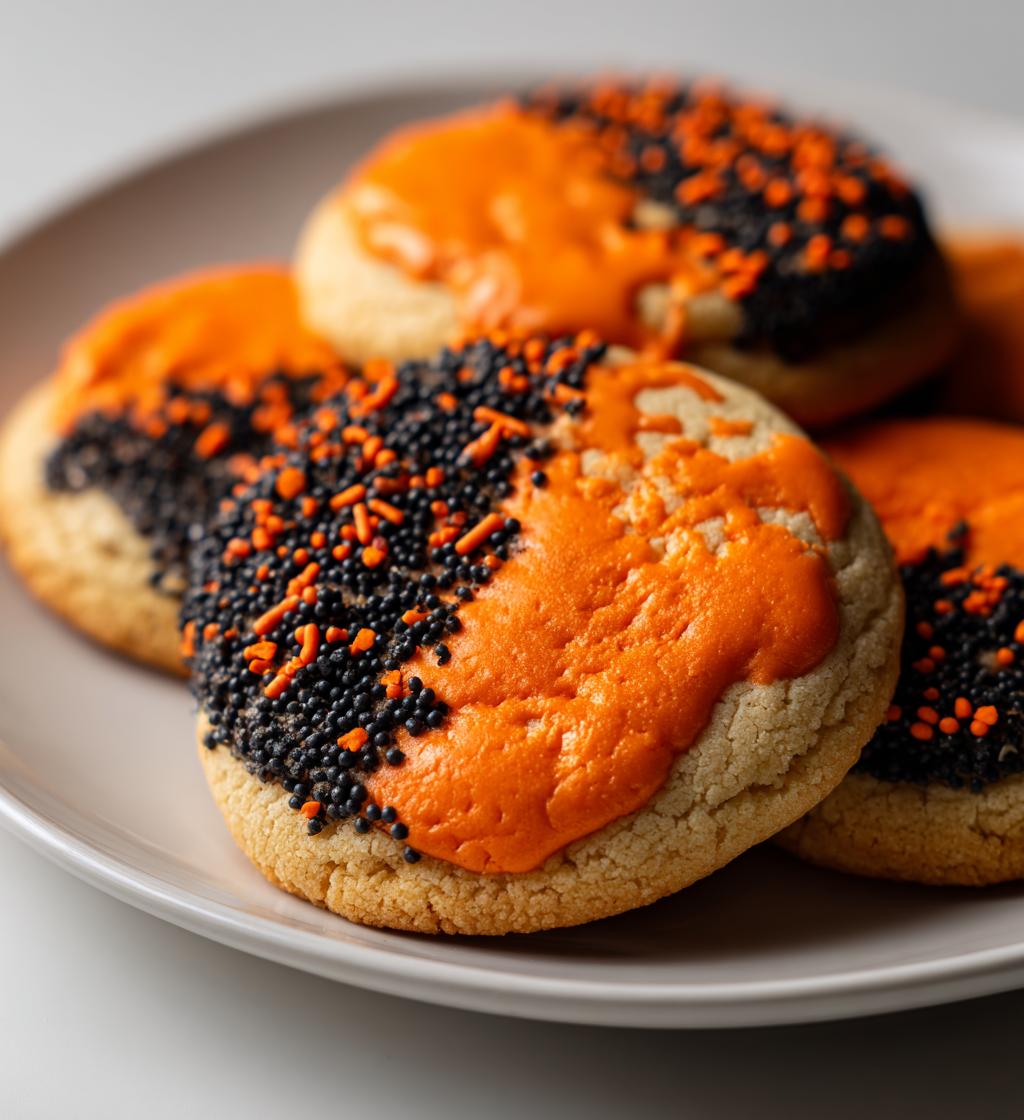
Oh my gosh, you have to try these ciastka halloween—they’re the cutest (and spookiest!) cookies ever! Every year, my kitchen turns into a haunted bakery as I whip up these easy, customizable treats. Whether you’re throwing a party or just want a fun baking project with the kids, these cookies are a total win. The best part? You can go wild with decorations—think ghosts, pumpkins, or even creepy spiders. Trust me, once you start, you won’t stop at just one batch!
Why You’ll Love These Ciastka Halloween
- Super easy to make—no fancy skills needed!
- Endlessly customizable with colors, shapes, and spooky decorations
- Perfect for Halloween parties or ghoulish gift-giving
- Kid-approved and fun to decorate together
- Soft, buttery texture with just the right amount of sweetness
- Great make-ahead treat—bake now, decorate later
- Smells like Halloween magic while baking
- Guaranteed to impress your little monsters (and adult friends too!)
Ingredients for Ciastka Halloween
(Psst! You probably have most of these in your pantry already—how’s that for easy?)
- 2 1/2 cups all-purpose flour (spooned and leveled—no packing it down!)
- 1/2 tsp baking powder (the secret to that perfect slight puff)
- 1/4 tsp salt (balances the sweetness like a charm)
- 1 cup unsalted butter, softened (leave it out for 30 minutes—soft, not melty!)
- 1 cup granulated sugar (regular white sugar works best here)
- 1 large egg (room temp blends smoother—trust me on this)
- 1 tsp vanilla extract (the good stuff if you’ve got it)
- Orange and black food coloring (gel works best for vibrant spooky shades)
- Halloween sprinkles or icing (go wild with bats, eyeballs, cobwebs—you do you!)
Equipment You’ll Need
Don’t worry—you likely have most of this already! Here’s what’ll make your ciastka halloween adventure a breeze:
- Mixing bowls (one for dry, one for wet—easy cleanup!)
- Electric mixer or wooden spoon (elbow grease works too)
- Halloween cookie cutters (or get creative with a knife!)
- Parchment paper (lifesaver for no-stick baking)
- Rolling pin (or a clean wine bottle in a pinch)
- Baking sheets (because spooky cookies need a stage)
How to Make Ciastka Halloween
Step 1: Prepare the Dough
First things first—preheat your oven to 350°F (175°C) and line your baking sheets with parchment paper. In a bowl, whisk together the flour, baking powder, and salt—this keeps everything light and fluffy. In another bowl, beat the butter and sugar until it’s creamy and dreamy (about 2 minutes). Crack in the egg and vanilla, mixing just until combined. Now, slowly add the dry ingredients to the wet, mixing until a soft dough forms. Want spooky colors? Divide the dough and knead in gel food coloring—orange for pumpkins, black for bats, or go wild with purple witches!
Step 2: Shape and Bake
Roll out the dough on a floured surface to about 1/4-inch thickness—thick enough to hold shapes but not too chunky. Use Halloween cookie cutters to stamp out ghosts, tombstones, or whatever screams „spooky” to you. Carefully transfer them to the baking sheets (a spatula helps!). Bake for 10–12 minutes until the edges are just turning golden. They’ll firm up as they cool, so don’t overbake! Let them rest on the sheet for 5 minutes before moving to a rack—patience, my little goblin!
Step 3: Decorate
This is where the magic happens! Once completely cool, unleash your inner artist. Pipe on icing spiderwebs, add candy eyeballs, or go classic with orange and black sprinkles. Pro tip: Thin royal icing with a splash of water for easy drizzling. Let the kids go nuts with edible glitter or crushed Oreos for „dirt.” The creepier, the better—these are ciastka halloween, after all!
Tips for Perfect Ciastka Halloween
- Chill sticky dough: If the dough feels too soft, pop it in the fridge for 15–20 minutes—it’ll be way easier to roll and cut!
- Gel food coloring: Skip the liquid stuff—gel gives vibrant colors without messing with the dough’s texture.
- Flour your surface: Lightly dust your rolling pin and counter to prevent sticking (but don’t overdo it—dry cookies are sad cookies).
- Cool completely before decorating: Warm cookies melt icing into puddles. Wait till they’re totally cool for crisp designs.
- Store smart: Keep them in an airtight container with parchment between layers so your spooky masterpieces stay fresh.
Variations for Ciastka Halloween
Want to mix things up? Try these fun twists:
- Chocolate dough: Swap 1/2 cup flour for cocoa powder—perfect for „dirt” or witch hat cookies!
- Gluten-free: Use a 1:1 gluten-free flour blend (I’ve tested Bob’s Red Mill—works like a charm).
- Spiderweb effect: Pipe white icing in spirals, then drag a toothpick outward for creepy webs.
- Monster eyes: Press mini M&Ms into warm cookies—they’ll look like googly eyes when baked!
Serving and Storing Ciastka Halloween
For the ultimate Halloween vibes, pile these cookies on a creepy platter—black slate or a vintage tray works wonders! They’ll stay fresh in an airtight container for up to a week (if they last that long). Want to prep ahead? Freeze undecorated cookies for up to a month—just thaw and decorate when you’re ready to spook!
Nutritional Information for Ciastka Halloween
Okay, let’s be real—these are cookies, not kale chips, but hey, Halloween only comes once a year! Here’s the scoop (based on standard ingredients, but brands and add-ons can tweak things):
- Serving size: 1 cookie (because who stops at one?)
- Calories: Around 120 per spooky little guy
- Sugar: 8g (mostly from the fun decorations, obviously)
Note: Nutrition varies based on your specific ingredients and how wild you go with icing and sprinkles. These are just estimates—because let’s face it, nobody’s counting candy eyeballs!
Frequently Asked Questions About Ciastka Halloween
Can I freeze the dough?
Absolutely! Wrap it tightly in plastic and freeze for up to 3 months. Thaw in the fridge overnight before rolling and cutting. Perfect for last-minute spooky cravings!
How do I prevent my cookies from spreading?
Chill the dough if it feels too soft, and make sure your butter isn’t melted—just softened. Also, don’t skip the parchment paper—it helps them bake evenly without sticking or spreading too much.
Can I make these without Halloween cookie cutters?
Of course! Get creative—use a glass for circles (pumpkins!), a knife to cut freehand shapes, or even a spoon for „ghost blobs.” Imperfect is part of the charm!
What’s the best icing for decorating?
Royal icing dries hard and smooth, but for easier piping, try a simple mix of powdered sugar + milk. Gel food coloring gives the boldest colors—just add a tiny drop at a time!
Can I use margarine instead of butter?
Technically yes, but butter gives richer flavor and better texture. Margarine might make them spread more, so chill the dough well before baking if you go that route.
Share Your Spooky Creations
I’d love to see your creepy cookie masterpieces! Tag me on Instagram so I can gush over your ciastka halloween—the spookier, the better!
Print
23 Spooky Ciastka Halloween Recipes That Will Delight Kids
- Total Time: 32 minutes
- Yield: 24 cookies 1x
- Diet: Vegetarian
Description
These Halloween cookies are fun to make and perfect for spooky celebrations. They are easy to customize with your favorite decorations.
Ingredients
- 2 1/2 cups all-purpose flour
- 1/2 tsp baking powder
- 1/4 tsp salt
- 1 cup unsalted butter, softened
- 1 cup granulated sugar
- 1 large egg
- 1 tsp vanilla extract
- Orange and black food coloring (optional)
- Halloween-themed sprinkles or icing for decorating
Instructions
- Preheat your oven to 350°F (175°C). Line baking sheets with parchment paper.
- In a bowl, whisk together flour, baking powder, and salt.
- In another bowl, beat butter and sugar until fluffy. Add the egg and vanilla, mixing well.
- Gradually mix in the dry ingredients until a dough forms. Divide and color portions with food coloring if desired.
- Roll out the dough and cut into Halloween shapes using cookie cutters.
- Bake for 10-12 minutes until edges are lightly golden. Cool before decorating.
Notes
- Chill the dough for 30 minutes if it’s too sticky.
- Use gel food coloring for vibrant colors.
- Store in an airtight container for up to a week.
- Prep Time: 20 minutes
- Cook Time: 12 minutes
- Category: Dessert
- Method: Baking
- Cuisine: American
Nutrition
- Serving Size: 1 cookie
- Calories: 120
- Sugar: 8g
- Sodium: 30mg
- Fat: 6g
- Saturated Fat: 3.5g
- Unsaturated Fat: 2g
- Trans Fat: 0g
- Carbohydrates: 15g
- Fiber: 0g
- Protein: 1g
- Cholesterol: 20mg
Keywords: Halloween cookies, spooky treats, easy dessert