
Oh, pizza z piekarnika—just saying it makes my mouth water! There’s something magical about that crispy crust, gooey cheese, and the smell of fresh toppings filling the kitchen. I remember the first time I tried making it at home—total disaster, burnt edges and all—but now? It’s my go-to for cozy nights and lazy Sundays. Whether you’re a pepperoni purist or a veggie lover, this pizza z piekarnika recipe is foolproof and endlessly customizable. Trust me, once you taste homemade, you’ll never look at delivery the same way. Let’s get baking!
Why You’ll Love This Pizza z Piekarnika
- Quick & Simple: From dough to table in under an hour—perfect for busy weeknights or last-minute cravings.
- Totally Customizable: Swap toppings to suit your mood (or fridge leftovers—no judgment here!).
- Crispy, Golden Crust: That satisfying crunch? *Chef’s kiss*. It’s all in the high-heat bake.
- Family-Friendly Fun: Let everyone build their own slices—kid-approved chaos guaranteed.
Ingredients for Pizza z Piekarnika
(Psst—don’t stress about exact amounts! Pizza is forgiving, and I eyeball half these things. But here’s the blueprint for perfection.)
- 1 pizza dough (homemade or store-bought—I won’t tell!)
- 1/2 cup tomato sauce (go for the herby, garlicky kind)
- 1 1/2 cups shredded mozzarella (the more, the merrier)
- 1/4 cup grated Parmesan (because extra cheese is never wrong)
Topping Ideas (Pick Your Faves!):
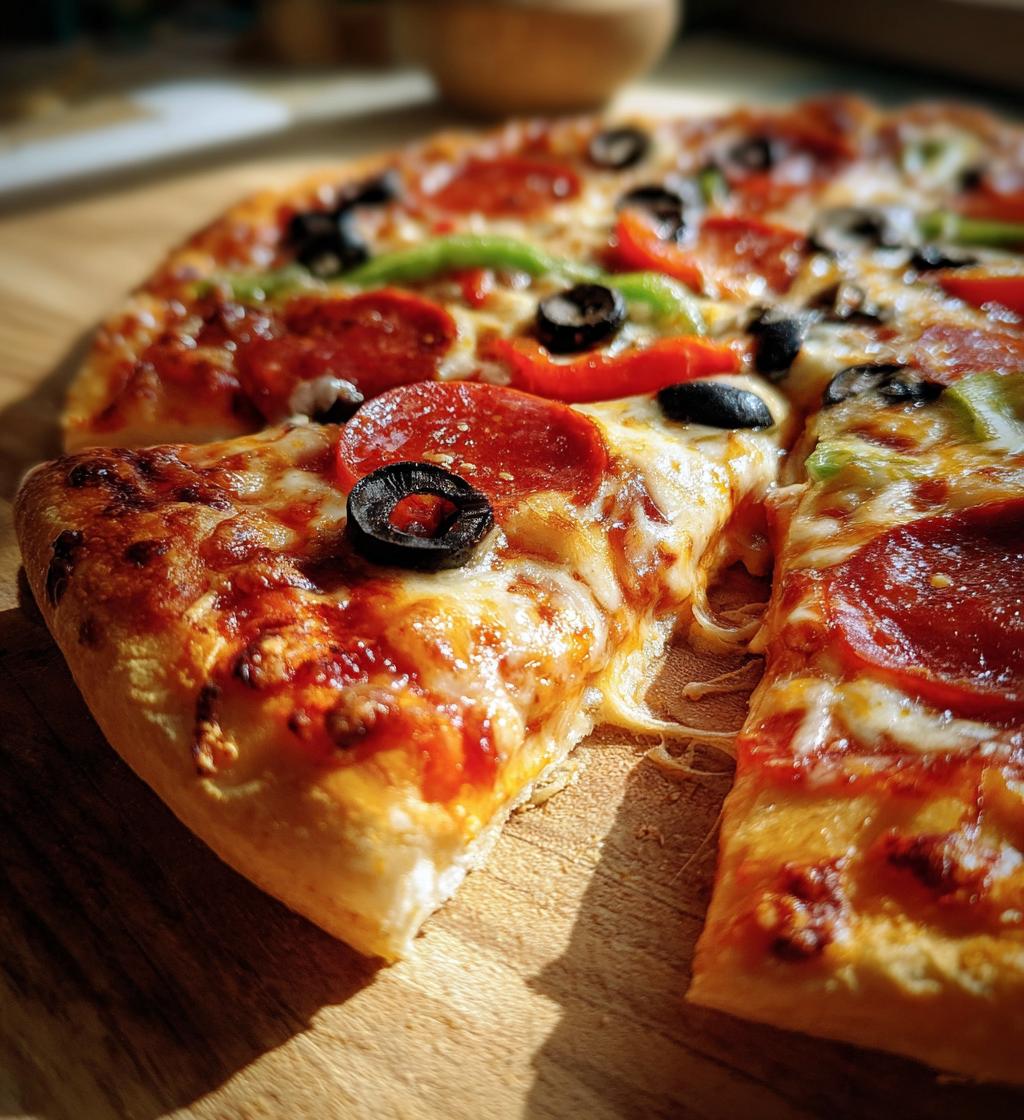
- 1/2 cup sliced pepperoni (classic!)
- 1/4 cup sliced black olives (my personal must-have)
- 1/4 cup sliced bell peppers (for crunch)
- 1 tsp dried oregano (sprinkle it like confetti)
- 1 tbsp olive oil (for that glossy finish)
See? Simple stuff. Raid your fridge—I bet you’ve got half these already!
Equipment You’ll Need
No fancy gadgets required—just the basics! Here’s what I grab every time:
- Baking sheet or pizza stone (stone = extra crispy crust!)
- Rolling pin (or a wine bottle in a pinch—I’ve done it)
- Sharp knife for chopping toppings
- Pizza cutter (optional, but oh-so-satisfying)
That’s it! Now let’s make some magic.
How to Make Pizza z Piekarnika
Alright, let’s get to the fun part—making that dreamy pizza z piekarnika! Follow these steps, and you’ll have a crispy, cheesy masterpiece in no time.
Step 1: Prepare the Dough
First, let that dough relax! If it’s cold from the fridge, give it 30 minutes at room temp—it’ll roll out way easier. Flour your surface (and hands!), then roll it to about 1/4-inch thick. Too thin? It’ll crisp up like a cracker (still tasty, though!). Transfer it to your baking sheet or stone—don’t worry if it’s not perfect. Rustic is charming!
Step 2: Add Sauce and Toppings
Now, the saucy part! Spread that tomato sauce evenly, leaving a little border for the crust. Pro tip: Use the back of a spoon in circular motions—no sauce avalanches! Next, cheese shower time: mozzarella first (melty goodness), then Parmesan for that salty kick. Pile on your toppings, but don’t go overboard—less is more if you want that perfect bake. Finish with a drizzle of olive oil and a sprinkle of oregano. Boom—ready for the oven!
Step 3: Bake to Perfection
Pop it in that hot oven (475°F, remember?) and bake for 12-15 minutes. You’ll know it’s done when the crust is golden-brown, the cheese is bubbly with little brown spots, and your kitchen smells like an Italian trattoria. Let it cool for 2 minutes (patience, I know!), then slice and devour. Warning: It’ll disappear fast!
Tips for the Best Pizza z Piekarnika
Want pizza that’s *chef’s kiss* every time? Here’s my hard-earned wisdom:
- Preheat your pan or stone—trust me, that sizzle makes the crust extra crispy.
- Go easy on toppings—too many and you’ll end up with a soggy middle (sad pizza).
- Let the dough rest—cold dough fights back! Room temp = stretchy, cooperative bliss.
- Watch the bake—ovens vary, so peek at 10 minutes to avoid charcoal crusts.
There you go—no more pizza pitfalls!
Customizing Your Pizza z Piekarnika
The best part about pizza z piekarnika? It’s a blank canvas! Here are some fun twists to switch it up:
- Veggie Delight: Swap pepperoni for mushrooms, spinach, and roasted garlic.
- Spicy Kick: Add jalapeños, red pepper flakes, or hot honey drizzle.
- Margherita Magic: Keep it classic with fresh basil and tomato slices.
- Breakfast Pizza: Crack eggs on top before baking—brunch game = strong.
Heck, try BBQ sauce instead of tomato, or go wild with pineapple (I won’t judge!). Your pizza, your rules.
Serving and Storing Pizza z Piekarnika
Let your pizza cool for just 2 minutes—enough to avoid molten cheese burns but still piping hot! Leftovers? Store slices in an airtight container in the fridge for up to 3 days. Reheat in a hot oven or toaster oven for that fresh-from-the-piekarnika crispness.
Pizza z Piekarnika Nutrition
Here’s the skinny on your slice (based on classic pepperoni): about 250 calories per serving. But remember—these are rough estimates! Toppings can swing it higher or lower, so customize guilt-free.
FAQ About Pizza z Piekarnika
Can I use store-bought dough?
Absolutely! I do it all the time when I’m short on time. Just let it sit at room temp for 30 minutes—it rolls out way easier. No shame in the shortcut game!
How thin should the crust be?
I aim for about 1/4-inch thick, but it’s totally your call! Thinner = crispier, thicker = chewier. Just don’t go paper-thin or it might burn before the toppings melt.
Can I freeze leftovers?
Yes! Wrap slices tightly in foil or plastic, then freeze for up to 2 months. Reheat straight from frozen in a 375°F oven until crispy—no sad, soggy pizza here.

Perfect Pizza z Piekarnika in Just 15 Minutes!
- Total Time: 35 minutes
- Yield: 1 large pizza (8 slices) 1x
- Diet: Vegetarian
Description
A classic pizza baked in the oven with a crispy crust, savory sauce, and your favorite toppings.
Ingredients
- 1 pizza dough (store-bought or homemade)
- 1/2 cup tomato sauce
- 1 1/2 cups shredded mozzarella cheese
- 1/4 cup grated Parmesan cheese
- 1/2 cup sliced pepperoni
- 1/4 cup sliced black olives
- 1/4 cup sliced bell peppers
- 1 tsp dried oregano
- 1 tbsp olive oil
Instructions
- Preheat your oven to 475°F (245°C).
- Roll out the pizza dough on a floured surface to your desired thickness.
- Transfer the dough to a baking sheet or pizza stone.
- Spread tomato sauce evenly over the dough.
- Sprinkle mozzarella and Parmesan cheese on top.
- Add pepperoni, olives, and bell peppers as toppings.
- Drizzle olive oil and sprinkle oregano over the pizza.
- Bake for 12-15 minutes until the crust is golden and cheese is bubbly.
- Remove from the oven, let cool for 2 minutes, then slice and serve.
Notes
- Customize toppings to your preference.
- For a crispier crust, preheat the baking sheet or pizza stone before adding the dough.
- Let the dough rest at room temperature for 30 minutes before rolling for easier handling.
- Prep Time: 20 minutes
- Cook Time: 15 minutes
- Category: Main Dish
- Method: Baking
- Cuisine: Italian
Nutrition
- Serving Size: 1 slice
- Calories: 250
- Sugar: 3g
- Sodium: 480mg
- Fat: 12g
- Saturated Fat: 5g
- Unsaturated Fat: 6g
- Trans Fat: 0g
- Carbohydrates: 28g
- Fiber: 2g
- Protein: 10g
- Cholesterol: 25mg
Keywords: pizza, homemade pizza, oven pizza, Italian pizza, pizza recipe