
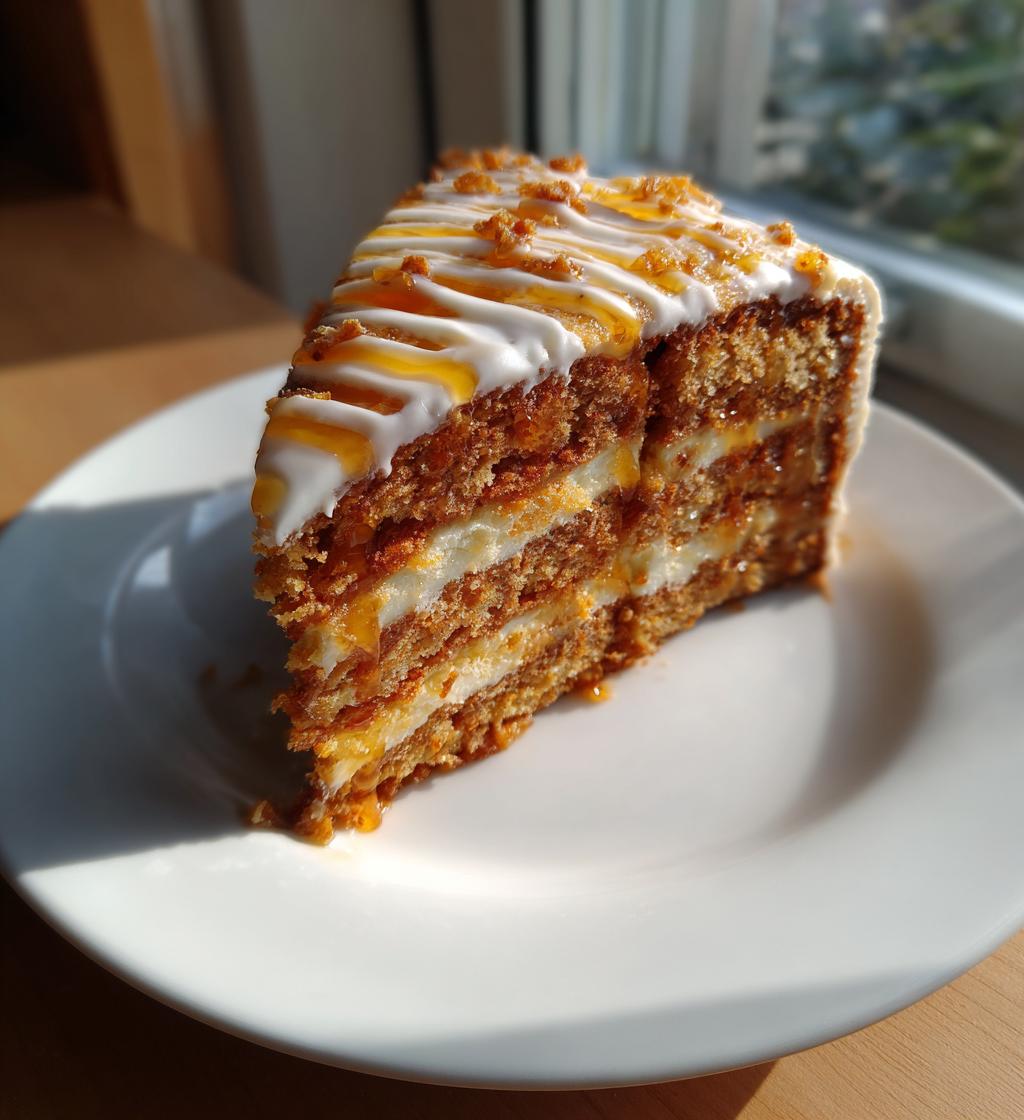
Oh, medovniky zdobenie—just saying it makes me smile! This isn’t just any honey cake decoration; it’s a little piece of Slovak tradition that turns simple ingredients into edible art. I still remember my first attempt—messy, lopsided, but so full of love (and honey!). The magic? That golden, spiced dough begging to be rolled thin and cut into shapes, then layered or stacked with creamy fillings. Whether you’re keeping it classic with walnuts or going wild with piped icing, every bite whispers comfort. Trust me, once you try decorating medovniky, you’ll understand why it’s been a family favorite for generations.
Why You’ll Love This Medovniky Zdobenie Recipe
- It’s a taste of Slovak tradition—each bite feels like a warm hug from grandma’s kitchen.
- So simple, even if you’ve never decorated a cake before, you’ll feel like a pro.
- That honey-spiced dough? Pure magic—soft, fragrant, and just sweet enough.
- Endless decorating fun! Stack layers, pipe icing, or go wild with nuts and fruit.
- Makes your kitchen smell like a cozy bakery—trust me, neighbors might drop by.
- Perfect for gifting—who wouldn’t adore a hand-decorated honey cake?
- Kids love cutting shapes (and sneaking dough scraps—oops!).
Ingredients for Medovniky Zdobenie
(Psst—grab these simple ingredients, and you’re halfway to honey cake magic! Pro tip: measure everything before you start. It’s a game-changer.)
- 200g honey – Use good-quality honey; it’s the soul of this recipe! I love a dark, floral one for depth.
- 300g flour (sifted) – Sifting is non-negotiable—it keeps the dough light as air. All-purpose works perfectly.
- 150g granulated sugar – Just enough sweetness to balance the honey. Brown sugar adds a caramel hint if you’re feeling fancy.
- 2 large eggs – Room temperature, please! Cold eggs make the dough grumpy.
- 1 tsp baking soda – Our little rising hero. No substitutions here!
- 100g butter (melted) – Unsalted is best. Let it cool slightly so it doesn’t cook the eggs when you mix.
Bonus flair: A pinch of cinnamon or cardamom if you want extra warmth. (I always do!)
Equipment Needed for Medovniky Zdobenie
Don’t worry—you probably already have most of this in your kitchen! Here’s what you’ll need to turn that honey dough into edible masterpieces:
- Mixing bowls – One large one for the dough, maybe a smaller one for melting butter.
- Rolling pin – Wooden or silicone, whatever gets that dough evenly thin.
- Cookie cutters – Circles for classic layers, or get playful with hearts and stars!
- Baking sheets – Line them with parchment paper—trust me, cleanup is a breeze.
- Whisk or wooden spoon – For mixing that honey-sugar magic.
- Sharp knife – If you’re skipping cutters and going freehand.
Optional but fun: Piping bags for fancy icing, or a pastry brush if you’re glazing with extra honey!
How to Make Medovniky Zdobenie Step by Step
Preparing the Dough
Okay, let’s get messy—in the best way! First, grab that honey and sugar. In a big bowl, whisk them together until they’re BFFs (that means no sugar lumps!). Now, add your room-temperature eggs one at a time, mixing well after each. Slow and steady wins the race here—you want it smooth, not scrambled! Pour in that slightly cooled melted butter and give it another good stir. (Pro tip: If your butter’s too hot, it’ll cook the eggs. Yikes!) Now, sift in your flour and baking soda. This is where the magic starts—knead gently until the dough comes together. It should feel soft but not sticky, like playdough that behaves. Too sticky? Add a sprinkle more flour. Too dry? A tiny drizzle of honey. Cover it with a towel and let it rest for 10 minutes—trust me, it makes rolling way easier!
Baking and Shaping Medovniky
Preheat that oven to 180°C (350°F)—no cheating, or your cakes might bake unevenly! Lightly flour your surface and rolling pin. Now, roll the dough to about 3mm thick—think “thin enough to see shadows but not so thin it tears.” Use cookie cutters (or a glass if you’re improvising) to cut shapes. Circles? Classic. Stars? Adorable. Hearts? Perfect for anniversaries! Transfer them carefully to parchment-lined baking sheets. They’ll puff a little, so leave some space between them. Bake for 12–15 minutes until golden at the edges. (Peek at 12 minutes—they go from golden to “oops, too dark” fast!) Let them cool completely before decorating. Patience, my friend—warm cakes melt icing!
Decorating Medovniky Zdobenie
Here’s where you get to shine! Stack layers with a smear of jam or dulce de leche between them. Pipe swirls of vanilla icing (powdered sugar + milk + vanilla—easy!). Crushed walnuts? Sprinkle them like confetti. Drizzle melted chocolate in zigzags or dust with cinnamon. My grandma’s trick: Brush the tops with warm honey for a glossy finish. Kids love helping here—let them go wild with sprinkles! No rules, just joy. And hey, if your decorations aren’t “Pinterest perfect”? That’s the charm of homemade. (Mine always look happily chaotic!)
Tips for Perfect Medovniky Zdobenie
Want your honey cakes to turn out flawless every time? Here are my tried-and-true tricks—learned from many happy (and messy!) batches:
- Chill the dough for 20 minutes if it’s too sticky—cold dough rolls out like a dream.
- Oven thermometer alert! Honey burns fast, so double-check your oven temp isn’t running hot.
- Roll between parchment—no sticking, no flour mess, just perfect thinness.
- Uniform thickness is key! Use chopsticks as “training wheels” beside your dough to gauge 3mm.
- Bake one test cake first to nail the timing—ovens vary!
- Cool completely before decorating, or your icing will slide right off (ask me how I know).
Bonus: Leftover dough scraps? Re-roll them into rustic cookies—zero waste, maximum yum!
Serving and Storing Medovniky Zdobenie
Oh, the best part—digging in! These honey cakes are happiest served at room temperature, so all those flavors can sing. Stack them high on a pretty plate, or arrange them like little edible art pieces. Pro tip: Let them sit out for 10 minutes after refrigerating—that honey flavor really pops when it’s not ice-cold!
Now, storing them? Easy-peasy! Just pop them in an airtight container—I swear by glass jars with tight lids—and they’ll stay fresh for:
- Room temperature: 3–4 days (if they last that long!)
- Fridge: Up to 1 week (layer with parchment to prevent sticking)
- Freezer: 2 months (wrap stacks in foil first—thaw overnight in the fridge)
Secret trick: Tuck a slice of bread in the container—it keeps the cakes soft by absorbing extra moisture. (Thanks, Grandma!) And whatever you do, don’t store them near strong-smelling foods—honey absorbs odors like a sponge. Learned that the hard way with my garlicky fridge incident. Oops!
Nutritional Information
Okay, let’s be real—you’re probably not counting calories when biting into that honey-spiced heaven! But just in case you’re curious, here’s the scoop per serving (about one decorated piece). Remember, these are rough estimates—your actual numbers might wiggle a bit depending on how generous you are with the honey drizzle!
- Calories: 250 (Worth every one!)
- Sugar: 20g (Mostly from that glorious honey)
- Fat: 10g (Butter makes it better, right?)
- Carbs: 35g (Flour + honey = cozy energy)
- Protein: 4g (Eggs for the win!)
Heads up: Nutritional values dance around based on your exact ingredients and decorations. Used almond flour? Added extra nuts? Your numbers will do their own thing—and that’s totally fine! This is homemade magic, not lab science.
FAQs About Medovniky Zdobenie
Can I use maple syrup instead of honey?
Technically? Yes, but—and this is a big but—it won’t taste like traditional medovniky! Honey gives that deep, floral sweetness maple syrup just can’t match. If you must swap, reduce other liquids slightly since maple’s thinner. (But really, hunt down some good honey—it’s worth it!)
How long do decorations last?
Icing holds up 2–3 days at room temp (longer if refrigerated). Fresh fruit toppings? Eat same-day. Nuts and chocolate drizzle stay crisp for weeks! Pro tip: Store decorated cakes with parchment between layers to prevent smudging.
Why did my dough crack when rolling?
Ah, the classic “dry dough drama”! Next time, knead in a teaspoon of honey or a splash of milk. And never skip the 10-minute rest—it lets the gluten relax. (Patch cracks with extra dough—no one will notice after baking!)
Can I make medovniky gluten-free?
Absolutely! Swap regular flour for a 1:1 gluten-free blend. Add 1/2 tsp xanthan gum if your mix doesn’t include it. The texture’s slightly denser but still delicious—I’ve fooled many gluten-loving friends!
My cakes turned out hard—what went wrong?
Overbaking is the usual culprit. Honey darkens fast—pull them at pale gold! Also, roll thinner next time (aim for 3mm). Stale cakes? Brush with milk and microwave 10 seconds to soften.
Share Your Medovniky Zdobenie Creations
I’d love to see your honey cake masterpieces! Snap a photo of your decorated medovniky and tag me—let’s swap stories and sticky-fingered baking adventures. Happy decorating!
Print
Irresistible Medovniky Zdobenie Recipe in 5 Simple Steps
- Total Time: 35 minutes
- Yield: 12 servings 1x
- Diet: Vegetarian
Description
Medovniky zdobenie is a traditional honey cake decoration technique.
Ingredients
- 200g honey
- 300g flour
- 150g sugar
- 2 eggs
- 1 tsp baking soda
- 100g butter
Instructions
- Mix honey and sugar in a bowl.
- Add eggs and melted butter.
- Sift flour and baking soda into the mixture.
- Knead the dough until smooth.
- Roll out the dough and cut into desired shapes.
- Bake at 180°C for 15 minutes.
- Decorate with icing or nuts.
Notes
- Store in an airtight container.
- Best served at room temperature.
- Prep Time: 20 minutes
- Cook Time: 15 minutes
- Category: Dessert
- Method: Baking
- Cuisine: Slovak
Nutrition
- Serving Size: 1 piece
- Calories: 250
- Sugar: 20g
- Sodium: 50mg
- Fat: 10g
- Saturated Fat: 5g
- Unsaturated Fat: 3g
- Trans Fat: 0g
- Carbohydrates: 35g
- Fiber: 1g
- Protein: 4g
- Cholesterol: 40mg
Keywords: honey cake, medovniky, decoration, Slovak dessert