
Oh, let me tell you about my absolute favorite Hungarian treat—hókifli! These delicate crescent-shaped pastries melt in your mouth with their buttery sweetness, and I swear, once you try them, you’ll be hooked. Growing up, my Hungarian grandmother would make them every Christmas, filling the house with that irresistible vanilla aroma. The best part? This hókifli recept is surprisingly simple—just a handful of basic ingredients and a little patience for chilling the dough. Trust me, even if you’re new to baking, you can master these tender, crumbly cookies that taste like a little bite of tradition.
Why You’ll Love This Hókifli Recept
- Buttery perfection – That melt-in-your-mouth texture is pure magic
- Simple ingredients – Just pantry staples you probably already have
- Quick to make – Most of the time is just hands-off chilling
- Traditional charm – These bring authentic Hungarian flavor to your table
- Holiday favorite – They look stunning on cookie trays (but are delicious year-round!)
- Easy to customize – Add citrus zest, spices, or dip in chocolate
- Great for sharing – Makes plenty to gift or serve at gatherings
- Beginner-friendly – No fancy techniques required
- Freezer-friendly – Make ahead and bake when needed
- Versatile – Perfect with coffee, tea, or as a sweet snack
Ingredients for Hókifli Recept
Okay, let’s gather our simple but magical ingredients—you might already have most of these in your kitchen! The key here is quality butter and keeping everything nice and cold. (Trust me, I learned this the hard way when my first batch turned into puddles!) Here’s what you’ll need:
- 500g all-purpose flour – The perfect base for our delicate pastry
- 250g unsalted butter (cold!) – Cut into small cubes, straight from the fridge
- 100g powdered sugar – For that light sweetness
- 2 egg yolks – Save the whites for another recipe
- 1 tsp vanilla extract – Pure vanilla makes all the difference
- Pinch of salt – Just a tiny bit to balance the flavors
A quick tip from my grandma—measure everything before you start! That cold butter works best when you move quickly. Oh, and don’t worry if your kitchen’s a bit warm, just pop the dough back in the fridge if it starts sticking. Ready to make some magic?
Equipment Needed
You won’t need any fancy gadgets for this hókifli recept—just a few basic tools that most home bakers already have. Here’s what I always grab from my kitchen:
- Mixing bowl – A medium-sized one works perfectly
- Pastry cutter or knife – For cutting in that cold butter
- Baking tray – Standard size, nothing special
- Parchment paper – To prevent sticking (trust me, it’s worth it!)
- Rolling pin – For getting that perfect thin dough
See? Told you it was simple! No stand mixer required—just good old-fashioned hands-on baking. Now let’s get to the fun part!
How to Make Hókifli Recept
Alright, let’s dive into making these heavenly crescents! I promise it’s easier than it looks—just follow these simple steps, and you’ll have perfect hókifli in no time. The secret? Cold ingredients and patience (I know, waiting is hard when you’re excited!).
Step 1: Prepare the Dough
First, whisk together your flour, powdered sugar, and that tiny pinch of salt in a large bowl. Now here’s the fun part—take your cold butter cubes and start cutting them into the flour mixture. I like using a pastry cutter, but two knives or even your fingers work too! You’re aiming for a crumbly texture with pea-sized butter pieces throughout. Don’t overmix—we want those butter pockets for flakiness!
Step 2: Shape and Chill
Next, make a well in the center and add your egg yolks and vanilla extract. Gently mix until a dough forms—it might seem dry at first, but keep going! Once it comes together, knead it lightly just until smooth (no more than 30 seconds). Form into a disk, wrap in plastic, and chill for at least 30 minutes. This step is non-negotiable—it makes rolling SO much easier!
Step 3: Bake to Perfection
Preheat your oven to 180°C (350°F) and line your baking tray with parchment. Roll out the chilled dough to about 1/4-inch thickness—if it sticks, sprinkle just a tiny bit of flour. Use a knife or pizza cutter to cut triangles (about 3 inches wide at the base). Roll each triangle up from the wide end to form crescents, pinching the ends slightly to seal. Bake for 15-20 minutes until just golden—they’ll continue firming up as they cool!
Pro tip: Rotate your tray halfway through baking for even color. And resist the urge to eat them straight from the oven—they’re fragile when hot! Let them cool completely on a rack before dusting with powdered sugar or dipping in chocolate. Enjoy your little bites of Hungarian heaven!
Tips for the Best Hókifli Recept
After making these dozens of times (and yes, having a few mishaps along the way!), I’ve learned all the little tricks for perfect hókifli every time. Here are my can’t-live-without tips:
- Keep everything cold – I mean it! Cold butter, cold bowl, even cold hands help prevent sticking
- Don’t overwork the dough – Mix just until combined for that perfect tender texture
- Uniform crescents – Cut triangles the same size so they bake evenly
- Chill between steps – If dough gets sticky, pop it back in the fridge for 10 minutes
- Watch the oven – They go from golden to overdone quickly!
- Cool completely – They’ll firm up as they cool—resist sneaking one too soon!
Remember, even imperfect hókifli taste amazing—so don’t stress if your crescents aren’t bakery-perfect!
Storage and Serving Suggestions
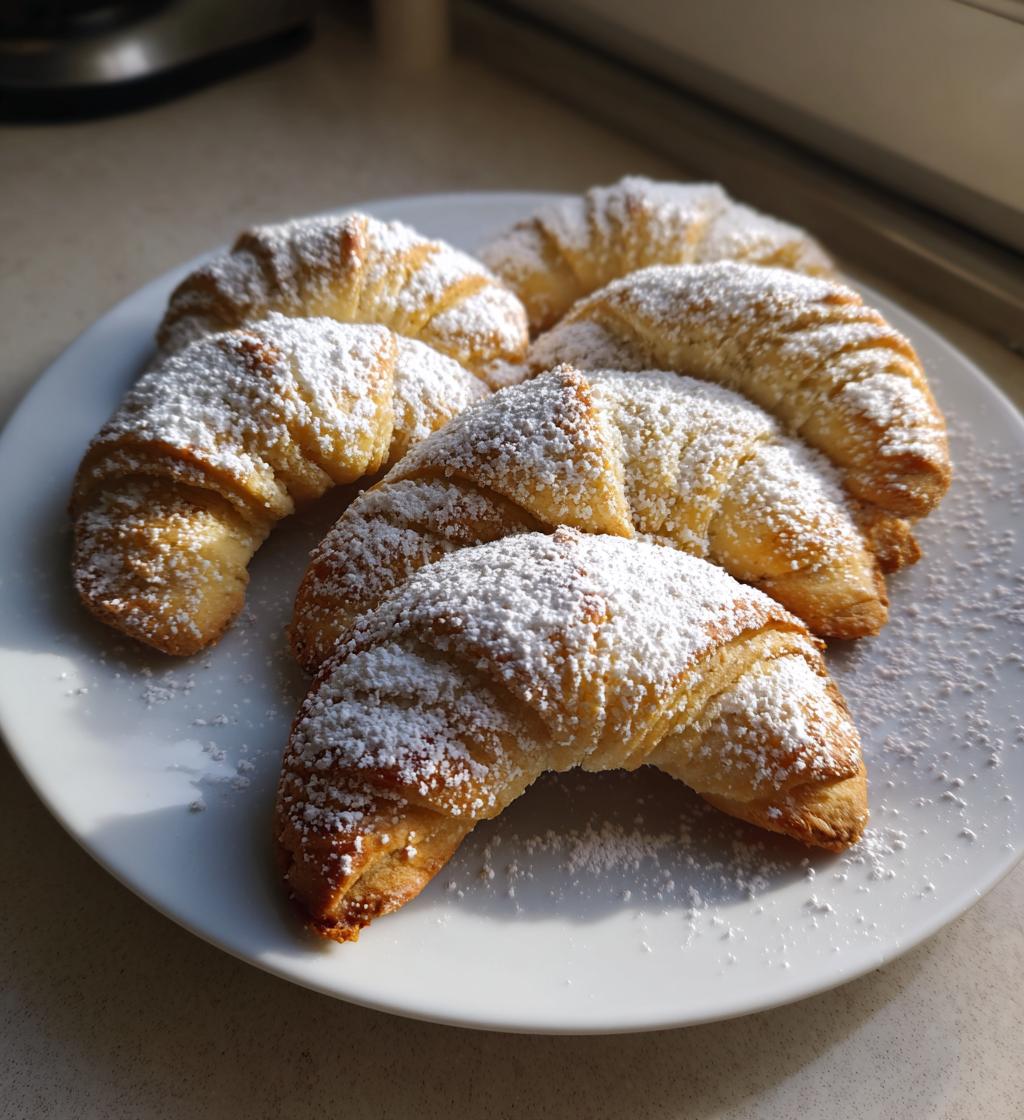
Here’s the best part—these hókifli stay delicious for days! Store them in an airtight container at room temperature for up to a week (if they last that long!). For extra freshness, you can layer them with parchment paper. My favorite way to serve? Dusted with powdered sugar while still slightly warm, alongside a strong cup of coffee or tea. They’re also gorgeous arranged on a vintage plate for guests—trust me, nobody can resist reaching for just one more!
Hókifli Recept Variations
Oh, the fun part—making these your own! While traditional hókifli are perfect as-is, I love playing with flavors. Here are my favorite twists:
- Citrus zest – Add lemon or orange zest to the dough for a fresh kick
- Spiced – Mix in 1/2 tsp cinnamon or cardamom for warmth
- Chocolate-dipped – Half-dip cooled crescents in melted chocolate (my weakness!)
- Nutty – Replace 50g flour with finely ground walnuts or almonds
- Vanilla sugar – Roll warm cookies in vanilla-scented sugar instead of powdered sugar
See? Endless possibilities with this versatile dough. Try one variation or mix and match—no wrong answers here!
Nutritional Information
Okay, let’s be real—these hókifli are a treat, not health food! But if you’re curious about the nutrition (or just want to plan how many you can justify eating in one sitting), here’s the scoop per piece. Remember, these are estimates—actual numbers can vary based on your specific ingredients.
- Calories: About 120kcal
- Fat: 8g (mostly from that glorious butter!)
- Carbohydrates: 12g
- Protein: 2g
Now, my philosophy? Life’s too short to stress over cookie calories—just enjoy every buttery bite! But if you’re watching portions, maybe don’t stand next to the cookie jar like I always do…
Common Questions About Hókifli Recept
Over the years, I’ve gotten so many questions about these little crescent cookies—and made plenty of mistakes myself! Here are the answers to the most common hókifli mysteries that might pop up while you’re baking:
Can I freeze the dough?
Absolutely! In fact, I always make extra to freeze. Just wrap the dough disk tightly in plastic wrap, then slip it into a freezer bag. It’ll keep beautifully for up to 1 month. When you’re ready to bake, let it thaw in the fridge overnight, then proceed as usual. Works like a charm!
Can I use margarine instead of butter?
Technically yes, but… (and this is a big but) the flavor and texture just won’t be the same. Butter gives that rich, melt-in-your-mouth quality that makes hókifli so special. I tried margarine once when I ran out of butter—never again! If you must substitute, at least use a high-quality baking margarine.
Why did my hókifli spread too much?
Oh honey, I feel your pain—been there! Almost always, this happens when the dough gets too warm before baking. Remember: cold is your friend! If your kitchen’s warm, work in batches and keep unused dough in the fridge. Also, make sure your oven is properly preheated—a too-cool oven can cause spreading too.
Share Your Hókifli Recept
I’d love to see your crescent creations! Snap a photo of your hókifli and tag me—I’ll be your biggest cheerleader! Leave a comment below with your favorite variation or any clever tricks you discovered. Happy baking, friends!
Print
Irresistible Hókifli Recept: 3 Simple Steps to Perfection
- Total Time: 50 minutes
- Yield: 24 pieces 1x
- Diet: Vegetarian
Description
A traditional Hungarian pastry known for its crescent shape and sweet, buttery flavor.
Ingredients
- 500g all-purpose flour
- 250g unsalted butter
- 100g powdered sugar
- 2 egg yolks
- 1 tsp vanilla extract
- Pinch of salt
Instructions
- Mix flour, powdered sugar, and salt in a bowl.
- Add cold butter and rub into the flour until crumbly.
- Stir in egg yolks and vanilla extract to form a dough.
- Chill dough for 30 minutes.
- Roll out dough and cut into crescent shapes.
- Bake at 180°C for 15-20 minutes until golden.
- Cool before serving.
Notes
- Keep butter cold for best texture.
- Chill dough before rolling for easier handling.
- Store in an airtight container to maintain freshness.
- Prep Time: 20 minutes
- Cook Time: 20 minutes
- Category: Dessert
- Method: Baking
- Cuisine: Hungarian
Nutrition
- Serving Size: 1 piece
- Calories: 120
- Sugar: 5g
- Sodium: 10mg
- Fat: 8g
- Saturated Fat: 5g
- Unsaturated Fat: 2g
- Trans Fat: 0g
- Carbohydrates: 12g
- Fiber: 0g
- Protein: 2g
- Cholesterol: 30mg
Keywords: hókifli, Hungarian pastry, crescent cookies