
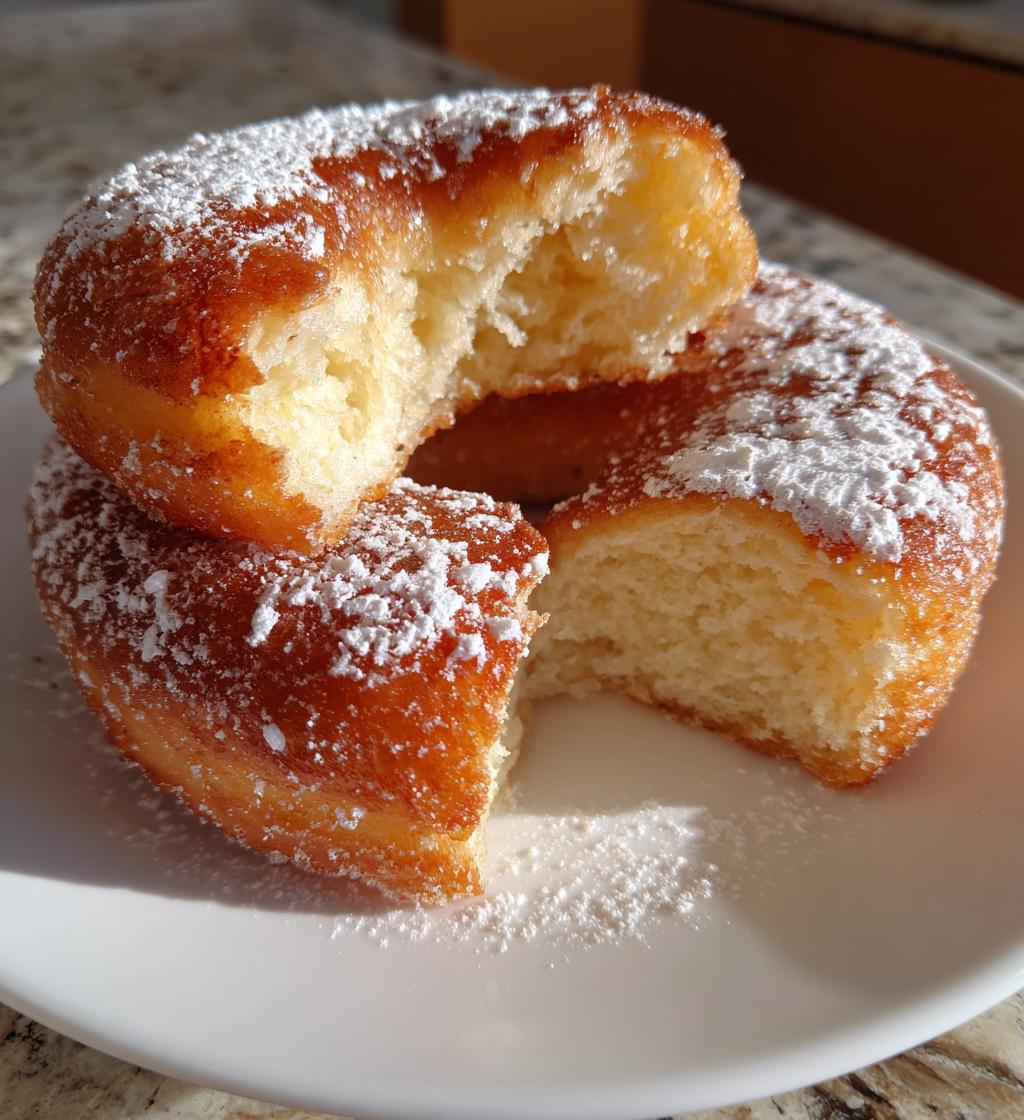
Oh, klasszikus fánk—just saying the name makes me smile! There’s something magical about biting into a warm, sugar-dusted donut fresh from the fryer. Crispy on the outside, soft and pillowy inside… pure comfort in every bite. I still remember my grandma frying up batches of these on Sunday mornings, filling the whole house with that irresistible sweet, buttery aroma. Now, I’m sharing her secrets (plus a few of my own tweaks) so you can bring that same joy to your kitchen. Trust me, once you try homemade, store-bought just won’t cut it!
Why You’ll Love This klasszikus fánk Recipe
- Simple ingredients you probably already have in your pantry
- Light, airy texture with just the right amount of crispy bite
- Perfectly sweet but not overwhelming—great for breakfast or dessert
- Frying gives that irresistible golden crust you can’t get from baking
- Endlessly customizable with glazes, sugars, or spices
- Makes your kitchen smell like a cozy bakery
- Impressive for guests but secretly easy to make
- Fun to shape (kids love helping cut the dough!)
- Tastes best fresh—no waiting for dough to rise!
- That nostalgic “grandma’s kitchen” flavor in every bite
Ingredients for klasszikus fánk
- 2 cups all-purpose flour (spooned & leveled)
- 1/2 cup granulated sugar
- 1 tbsp baking powder (yes, a full tablespoon—it’s the lift secret!)
- 1/2 tsp fine sea salt
- 1/2 cup whole milk (see notes for subs)
- 2 large eggs (room temp blends easier)
- 2 tbsp unsalted butter, melted and slightly cooled
- 1 tsp pure vanilla extract (or almond extract for fun twists)
- Vegetable or canola oil for frying (about 4 cups)
- Extra sugar or glaze for coating (go wild here!)
Ingredient Notes
Flour: All-purpose works best, but if you only have bread flour, reduce it to 1 3/4 cups—it’s thirstier. For gluten-free, try a 1:1 blend.
Milk: Whole milk makes the richest donuts, but any milk (even almond or oat) works in a pinch. If using non-dairy, add an extra tbsp of butter.
Butter: MUST be unsalted—we control salt separately. If you only have salted, skip the added salt in the recipe.
Oil: Use something neutral with a high smoke point. Peanut oil’s great if you have it, but regular veggie oil’s fine. Never reuse oil more than twice for donuts—it picks up flavors.
Pro tip: Eggs blend smoother when they’re not fridge-cold! Just let them sit out while you prep other ingredients.
Equipment Needed for klasszikus fánk
- Heavy-bottomed pot or Dutch oven (for stable frying—no thin pans!)
- Candy/fry thermometer (trust me, guessing oil temp leads to greasy or burnt donuts)
- Donut cutter (or improvise with a round cookie cutter + bottle cap for centers)
- Mixing bowls (one large, one medium—I like glass for easy scraping)
- Whisk and wooden spoon (or just a fork in a pinch)
- Rolling pin (or an empty wine bottle works shockingly well)
- Slotted spoon or spider strainer (for safe flipping and draining)
- Paper towels or wire rack (to drain excess oil—rack keeps ‘em crispier)
- Small bowls (for sugar/glaze coating—I reuse cereal bowls)
Don’t stress if you’re missing something! My first batch was made with a drinking glass to cut circles and a meat thermometer—they were still delicious.
How to Make klasszikus fánk
Okay, let’s get frying! These donuts come together faster than you’d think, but the magic is in the details—don’t skip resting the dough or checking that oil temp. I’ve burned (and learned from) enough batches to know!
Step 1: Prepare the Dough
- Whisk dry ingredients: In your big bowl, mix flour, sugar, baking powder, and salt. Go ahead and give it a little fluff with the whisk—this is your donut’s fluffy future!
- Mix wet ingredients: In the smaller bowl, beat eggs lightly, then whisk in milk, melted butter, and vanilla until it’s all frothy and happy. (Pro tip: If your butter’s too hot, it’ll scramble the eggs—let it cool to just warm first.)
- Combine carefully: Pour the wet mix into the dry and stir with a wooden spoon JUST until no dry spots remain. Overmixing = tough donuts, so embrace a few lumps! The dough will be sticky—that’s perfect.
- Rest the dough: Cover the bowl with a towel and let it sit for 10 minutes. This relaxes the gluten so your donuts stay tender, not chewy. (Use this time to heat your oil!)
Step 2: Shape and Cut the Donuts
- Roll it out: Dust your counter generously with flour (trust me, sticky dough wars aren’t fun). Pat the dough into a ball, then roll to 1/2-inch thickness—about the height of two stacked quarters. Too thin, and they’ll fry up dense; too thick, and the centers stay doughy.
- Cut with confidence: Dip your cutter in flour to prevent sticking, then press straight down without twisting (twisting seals edges and limits rise). Save those donut holes—they’re the cook’s treat! Reroll scraps once, but any more and they get tough.
- Let them rest again: Lay cut donuts on a floured tray for 5 minutes while your oil heats. This helps them hold their shape when frying.
Step 3: Fry to Perfection
- Heat the oil: Pour oil into your pot until it’s 2–3 inches deep. Attach your thermometer and heat to 350°F (177°C)—this is GOLDEN. If it smokes, it’s too hot; if donuts sink and soak up oil, it’s too cool.
- Fry in batches: Gently slide 2–3 donuts in with a slotted spoon (crowding drops the temp). They’ll sink, then float in about 10 seconds—that’s when you start timing!
- Flip once: After 60 seconds, use your spoon to flip them. They should be golden underneath. Fry another 60 seconds until both sides are evenly bronzed.
- Drain well: Transfer to a wire rack or paper towels. Let them cool just enough to handle (about 2 minutes) before coating—sugar sticks best when they’re warm but not piping hot.
Watch for the signs: Perfect donuts have a delicate crackly crust, puff up slightly, and sound softly hollow when tapped. If they brown too fast, lower the heat; if they’re greasy, the oil’s too cool. You’ve got this!
Tips for Perfect klasszikus fánk
Alright, let’s talk donut secrets! After burning (and salvaging) more batches than I’d like to admit, here’s what I’ve learned to guarantee golden, fluffy success every time:
- Oil temperature is EVERYTHING: That thermometer isn’t optional—350°F (177°C) is the sweet spot. Too hot, and they’ll burn outside before cooking inside; too cool, and they’ll soak up oil like sponges. Check between batches!
- Resting = tenderness: Don’t skip the 10-minute dough rest! It relaxes the gluten so your donuts stay light, not tough. Same goes for letting cut shapes rest before frying—they’ll hold their shape better.
- Dry-to-wet ratio matters: If your dough feels too sticky, add flour 1 tbsp at a time. Too dry? A splash more milk. It should be tacky but not stick to your fingers like glue.
- Fry small batches: Crowding the pot drops the oil temp fast. I do 2–3 donuts max at once—patience pays off in crispiness!
- Drain smart: Paper towels work, but a wire rack over a sheet pan keeps bottoms crisp. Flip them once while draining to prevent soggy spots.
- Coating timing: Roll in sugar or dip in glaze while still warm (not hot!) for maximum stick. Too cold, and it’ll just slide right off.
- Save the holes: Those little centers fry faster—about 45 seconds per side. Perfect for testing oil temp or bribing kids to stay out of the kitchen!
- No twisting when cutting: Press the cutter straight down. Twisting seals the edges, which keeps them from rising into that perfect fluffy ring.
- Reheat leftovers right: 10 seconds in the microwave softens them, but 5 minutes in a 350°F (177°C) oven crisps them back up. Avoid the air fryer—it dries them out.
- Embrace imperfections: Lopsided donuts taste just as good! My first batches looked more like abstract art, and you know what? They disappeared just as fast.
Remember, even “mistakes” are delicious—slightly overdone? Call them caramelized. A little dense? Extra hearty. The joy’s in the making (and eating)!
Serving Suggestions for klasszikus fánk
Oh, the possibilities! While these donuts are downright magical all on their own, here are my favorite ways to serve them up for maximum happiness:
- Classic sugar shower: Roll warm donuts in granulated sugar for that nostalgic bakery feel. For extra fun, mix cinnamon or citrus zest into the sugar first!
- Coffee’s best friend: Serve with a big mug of strong coffee—the sweet-and-bitter combo is morning perfection. Dunking is absolutely encouraged.
- Glaze madness: Whisk powdered sugar with a splash of milk and vanilla for a simple glaze. Drizzle or dunk—messy fingers are part of the joy.
- Fruit frenzy: Top with fresh berries or a quick berry compote. The tartness cuts through the sweetness beautifully.
- Ice cream sandwich: Slice a donut horizontally and sandwich a scoop of vanilla ice cream. Let it get slightly melty—trust me on this.
- Breakfast spread: Pair with crispy bacon and fresh orange juice for the ultimate sweet-salty morning treat.
- Kid’s delight: Let little ones decorate with sprinkles, chocolate chips, or colored sugars. (Bonus: keeps them busy while you fry the next batch!)
- Dessert platter: Arrange donuts with chocolate sauce, caramel, and whipped cream for dipping. Perfect for sharing… or not.
My personal favorite? Still warm from the fryer, torn open with my fingers, no toppings at all—just pure, buttery donut bliss. But don’t let me stop you from getting creative!
Storage and Reheating
Okay, let’s be real—these donuts are best fresh, but if you somehow have leftovers (no judgment if you don’t!), here’s how to keep them tasting amazing:
- Room temp: Store in an airtight container for up to 1 day. They’ll soften but still taste great—just avoid the fridge unless absolutely necessary (it dries them out).
- Freezing: Freeze uncoated donuts in a single layer on a tray, then transfer to a freezer bag for up to 1 month. Thaw at room temp, then refresh in a 350°F (177°C) oven for 5 minutes.
- Reheating magic: For that just-fried crispness, pop them in a 350°F (177°C) oven for 5–7 minutes. Microwave for 10 seconds if you prefer them soft and warm.
- Glaze/sugar tip: If you’ve already coated them, store between layers of parchment paper to prevent sticking. Refresh with a quick roll in fresh sugar after reheating.
- Donut holes hack: Toss day-old holes in a skillet with butter and cinnamon for instant “churro” bites!
Warning: They might disappear faster than you planned—I take no responsibility for midnight snack attacks!
klasszikus fánk Variations
Once you’ve mastered the basic recipe (and trust me, you will!), it’s time to play! Here are my favorite ways to mix things up—because who says you can’t teach an old donut new tricks?
- Cinnamon sugar bliss: Toss warm donuts in a mix of 1/2 cup sugar + 1 tbsp cinnamon. Bonus: add a pinch of nutmeg for extra warmth.
- Chocolate dip dream: Melt 1 cup chocolate chips with 1 tbsp coconut oil, then dunk half of each donut. Sprinkle with crushed nuts or sea salt before it sets.
- Lemon zest sparkle: Add 2 tbsp lemon zest to the dough and coat in powdered sugar. Sunshine in every bite!
- Maple glaze magic: Whisk 1 cup powdered sugar with 3 tbsp real maple syrup and 1 tbsp milk. Drizzle over donuts—bacon crumbles optional but highly recommended.
- Berry burst: Fold 1/2 cup finely chopped strawberries or blueberries into the dough. The fruit caramelizes slightly when fried—heavenly!
- Nutty delight: Replace 1/4 cup flour with finely ground almonds or hazelnuts. Roll in toasted coconut for extra crunch.
- Spiced chai twist: Add 1 tsp cinnamon, 1/2 tsp cardamom, and 1/4 tsp ginger to the dry ingredients. Dip in vanilla glaze and sprinkle with crushed chai tea leaves.
- Mocha madness: Mix 1 tbsp instant espresso powder into the flour, then dip cooled donuts in chocolate ganache.
- Savory surprise: Skip the sugar in the dough, add 1/2 cup grated cheddar and 1 tsp garlic powder. Serve with marinara for dipping—breakfast pizza vibes!
- Birthday fun: Add rainbow sprinkles to the dough and coat with vanilla glaze. Instant party!
My rule? If it sounds good together, it’ll probably taste amazing in donut form. The worst that can happen is you invent a new favorite by accident—like my infamous „peanut butter-bacon-jam” experiment (don’t knock it ‘til you try it!).
Nutritional Information
Okay, let’s be real—these donuts are a treat, not health food (but oh, what a treat they are!). Here’s the estimated nutrition per plain donut, but keep in mind that toppings and variations will change things. And hey, homemade means no weird preservatives—that counts for something, right?
- Calories: 220 (worth every one!)
- Total Fat: 8g (5g saturated—thank that glorious butter)
- Cholesterol: 35mg (mostly from those happy eggs)
- Sodium: 180mg (skip the salt sprinkle if you’re watching this)
- Total Carbs: 30g (hello, fluffy goodness)
- Sugars: 10g (could be worse for dessert!)
- Protein: 4g (surprising little protein boost)
Important note: These numbers are rough estimates based on standard ingredients—your actual results will vary depending on exact measurements, oil absorption, and how liberally you coat them in sugar (no judgment here!). For precise counts, use a nutrition calculator with your specific brands.
My philosophy? Enjoy every bite mindfully, share with friends, and balance it out with veggies later. Life’s too short to skip warm donuts!
Frequently Asked Questions
Can I bake these instead of frying?
Technically yes, but you’ll lose that classic crispy exterior—they’ll be more like cake donuts. If you must bake, try 375°F (190°C) for 8–10 minutes, but spray the tray well so they don’t stick. Honestly? Frying’s what makes these magical!
How long do they stay fresh?
They’re best eaten within 4 hours (who am I kidding—they rarely last that long!). Stored airtight at room temp, they’ll stay decent for 1 day. After that, freeze ’em or turn leftovers into bread pudding!
Why did my donuts turn out dense?
Overmixing the dough is the usual culprit—stir just until combined, lumps are okay! Also check your baking powder isn’t expired. And no skipping the dough rest—that 10-minute pause makes all the difference for fluffiness.
Can I make the dough ahead?
Not really—the baking powder starts working right away. But you can mix dry and wet ingredients separately up to 1 hour ahead, then combine when ready to fry. Fresh is always best with these!
Help! My oil keeps getting too hot/cool.
Happens to everyone! Keep adjusting the burner—small changes make a big difference. If it overheats, add a splash of cool oil. Too cool? Remove donuts briefly while reheating. Pro tip: Fry the holes first to test your temp without wasting a full donut.

Irresistible klasszikus fánk Recipe with 10 Pro Tips
- Total Time: 25 mins
- Yield: 12 donuts 1x
- Diet: Vegetarian
Description
Classic donuts are sweet, fried pastries with a soft interior and a slightly crispy exterior. Perfect for breakfast or dessert.
Ingredients
- 2 cups all-purpose flour
- 1/2 cup sugar
- 1 tbsp baking powder
- 1/2 tsp salt
- 1/2 cup milk
- 2 eggs
- 2 tbsp melted butter
- 1 tsp vanilla extract
- Oil for frying
Instructions
- Mix flour, sugar, baking powder, and salt in a bowl.
- In another bowl, whisk milk, eggs, melted butter, and vanilla.
- Combine wet and dry ingredients to form a dough.
- Roll dough to 1/2-inch thickness and cut into donut shapes.
- Heat oil to 350°F and fry donuts until golden brown.
- Drain on paper towels and coat with sugar or glaze.
Notes
- Let dough rest for 10 minutes before rolling.
- Use a thermometer for accurate oil temperature.
- Flip donuts once during frying for even browning.
- Prep Time: 15 mins
- Cook Time: 10 mins
- Category: Dessert
- Method: Frying
- Cuisine: American
Nutrition
- Serving Size: 1 donut
- Calories: 220
- Sugar: 10g
- Sodium: 180mg
- Fat: 8g
- Saturated Fat: 3g
- Unsaturated Fat: 4g
- Trans Fat: 0g
- Carbohydrates: 30g
- Fiber: 1g
- Protein: 4g
- Cholesterol: 35mg
Keywords: classic donuts, homemade donuts, fried pastries