
Oh, Easter just isn’t Easter without a batch of homemade ciastka wielkanocne—am I right? There’s something magical about these little cookies that brings my whole family together every spring. I remember my grandma letting me press cookie cutters into the dough as a kid, flour everywhere, laughing as we made bunny and egg shapes. Now, I get to share that same joy with my nieces and nephews. These cookies are more than just a treat; they’re a tradition. And the best part? They’re so simple, even if you’re usually more of a „store-bought dessert” person, you’ll feel like a pro baker with this recipe!
Why You’ll Love These Ciastka Wielkanocne
- Super simple to make, even if you’re not a baking pro
- Perfectly festive for Easter with fun shapes and colors
- Totally customizable—go wild with sprinkles, icing, or food coloring
- Great activity to do with kids (or just for yourself, no judgment here!)
- Makes your whole house smell like butter and happiness
- Ideal for gifting or sharing at holiday gatherings
- The dough is forgiving—if you mess up, just roll it out again
- Tastes like childhood memories and springtime all in one bite
Ingredients for Ciastka Wielkanocne
(Psst—grab these simple ingredients, and you’re halfway to cookie heaven! I’ve noted which items are optional, so don’t stress if you don’t have them.)
- 2 cups all-purpose flour (spooned & leveled—no packing!)
- 1/2 cup granulated sugar (or a smidge more if you like sweeter cookies)
- 1/2 cup unsalted butter, softened (leave it out for 30 minutes—no microwaving!)
- 1 large egg, room temperature (this helps everything blend smoothly)
- 1 tsp vanilla extract (the good stuff—imitation just won’t do)
- 1/2 tsp baking powder (fresh is best—check that expiration date)
- 1/4 tsp salt (balances the sweetness perfectly)
- Food coloring (optional, but oh-so-fun—gel works best for vibrant hues)
- Sprinkles or icing (optional, but seriously, who can resist?)
Equipment You’ll Need
No fancy gadgets required—just grab these basic kitchen tools (you probably already have most of them!):
- Large mixing bowl (for all that delicious dough action)
- Electric mixer or sturdy wooden spoon (your arm workout for the day)
- Measuring cups & spoons (precision is key, folks!)
- Rolling pin (or improvise with a wine bottle—been there!)
- Easter-themed cookie cutters (bunnies, eggs, lambs—go wild!)
- Baking sheet (one is fine, but two speeds things up)
- Parchment paper (trust me, cleanup is SO much easier)
- Cooling rack (patience is a virtue… but cookies need space too)
How to Make Ciastka Wielkanocne
Alright, let’s get to the fun part—making these adorable Easter cookies! Don’t worry if you’re a beginner; I’ll walk you through every step. Just follow along, and soon enough, you’ll have a batch of cookies that look (and taste!) like they came from a bakery.
Preparing the Dough
- Preheat your oven to 350°F (175°C)—this gives it time to get nice and toasty while you work.
- Cream the butter and sugar together in a large bowl until it’s light and fluffy. (This is where your mixer or strong arm comes in handy!)
- Beat in the egg and vanilla until everything is smooth and well combined.
- Whisk the dry ingredients (flour, baking powder, and salt) in a separate bowl. This helps avoid clumps!
- Gradually mix the dry ingredients into the wet mixture. Go slow—a sticky dough will form, and that’s perfect.
- Add food coloring now if you want colorful dough! Knead it in gently until the color is even (but don’t overwork it).
Shaping and Baking
- Roll out the dough on a lightly floured surface to about 1/4-inch thickness.
- Press cookie cutters into the dough to create your Easter shapes. (Pro tip: Dip the cutters in flour to prevent sticking!)
- Transfer the shapes to a parchment-lined baking sheet, leaving a little space between them—they won’t spread much, but it’s good to be safe.
- Bake for 10–12 minutes, until the edges are just barely golden. Don’t overbake—they firm up as they cool.
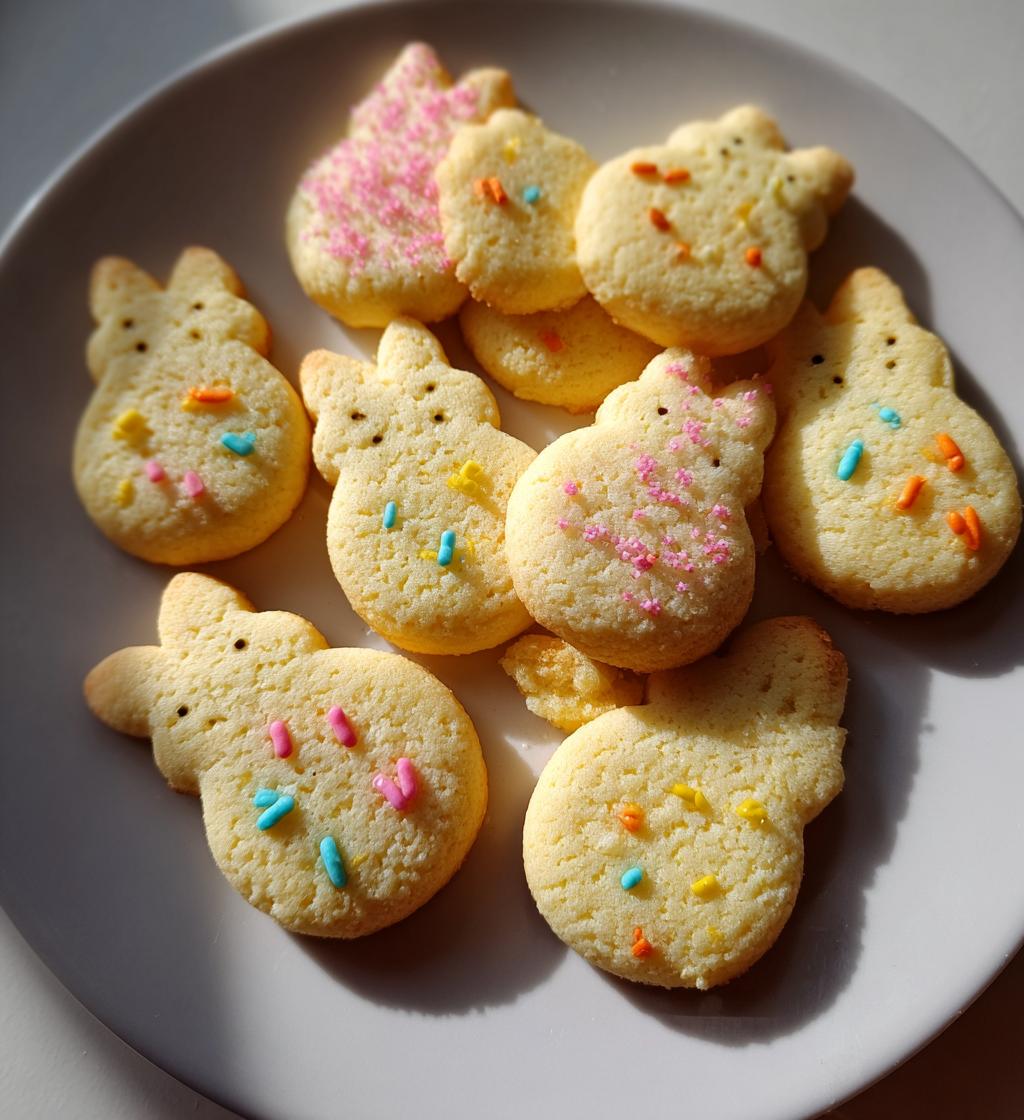
Decorating Your Ciastka Wielkanocne
Here’s the best part—making them pretty! But first, let the cookies cool completely (I know, it’s hard to wait). Then go wild:
- Spread a thin layer of icing and add sprinkles.
- Use food coloring pens for tiny details (bunny faces, anyone?).
- Or keep it simple with a dusting of powdered sugar—elegant and easy!
Now, step back and admire your edible Easter masterpieces. You did it!
Tips for Perfect Ciastka Wielkanocne
Want bakery-worthy cookies every time? Here are my foolproof tricks:
- Chill sticky dough for 30 minutes—it makes rolling SO much easier.
- Gel food coloring gives vibrant hues without altering dough texture.
- Rotate your baking sheet halfway through for even browning.
- Flour your cutter between shapes to prevent tearing.
- Underbake slightly—they’ll firm up as they cool for that perfect soft bite.
- Let icing set fully before stacking (or you’ll have a colorful mess!).
Variations for Ciastka Wielkanocne
Want to mix things up? Here are some fun twists on the classic recipe:
- Lemon zest: Add a teaspoon for a bright, citrusy kick
- Almond extract: Swap vanilla for almond (just 1/2 tsp—it’s strong!)
- Spiced: Try a pinch of cinnamon or cardamom in the dough
- Chocolate-dipped: Melt some chocolate and dunk half the cookie
- Jam-filled: Sandwich two cookies with raspberry or apricot jam
- Different shapes: Use hearts for spring or crosses for tradition
The best part? No one will know how easy these variations are—they’ll just think you’re a baking genius!
Storing and Serving Ciastka Wielkanocne
These cookies stay fresh in an airtight container at room temperature for up to a week—if they last that long! For gifting, stack them in a cute Easter tin with parchment between layers. Just keep them away from humidity (nobody likes soggy cookies). Pro tip: They freeze beautifully for up to 2 months—perfect for sneaking a springtime treat later!
Nutritional Information
(Just a heads up—these are estimates per cookie, and your exact numbers might vary a tiny bit depending on size and decorations!)
- Calories: 120
- Sugar: 6g
- Fat: 5g
- Saturated Fat: 3g
- Carbs: 16g
- Protein: 2g
Not bad for a little taste of Easter joy, right?
Frequently Asked Questions
Can I freeze the cookie dough?
Absolutely! Wrap it tightly in plastic and freeze for up to 3 months. Thaw overnight in the fridge before rolling—easy Easter prep done ahead!
Why did my cookies spread?
Most likely your butter was too soft or the dough got warm. Chill it for 30 minutes before baking—cold dough holds its shape better.
Any egg substitutes?
Try 1/4 cup applesauce or mashed banana per egg. The texture will be slightly different, but still delicious!
Can I use margarine instead of butter?
You can, but the flavor won’t be as rich. If you do, pick one with at least 80% fat content.
How do I get vibrant colors without watery dough?
Gel food coloring is your best friend—it packs way more pigment without adding liquid. A little goes a long way!
Now that you’re armed with all the answers, go make some ciastka wielkanocne magic! And don’t forget to tag me in your cookie photos—I love seeing your Easter creations!
Print
Magical Ciastka Wielkanocne Recipe with 8 Easy Steps
- Total Time: 32 minutes
- Yield: 24 cookies 1x
- Diet: Vegetarian
Description
These Easter cookies are a delightful treat for the holiday season. They are easy to make and perfect for sharing with family and friends.
Ingredients
- 2 cups all-purpose flour
- 1/2 cup granulated sugar
- 1/2 cup unsalted butter, softened
- 1 large egg
- 1 tsp vanilla extract
- 1/2 tsp baking powder
- 1/4 tsp salt
- Food coloring (optional)
- Sprinkles or icing for decoration
Instructions
- Preheat your oven to 350°F (175°C) and line a baking sheet with parchment paper.
- In a large bowl, cream together the butter and sugar until light and fluffy.
- Add the egg and vanilla extract, mixing well.
- In a separate bowl, whisk together the flour, baking powder, and salt.
- Gradually add the dry ingredients to the wet ingredients, mixing until a dough forms.
- If desired, divide the dough and knead in food coloring.
- Roll out the dough and cut into Easter-themed shapes using cookie cutters.
- Place the cookies on the prepared baking sheet and bake for 10-12 minutes, or until lightly golden.
- Let the cookies cool completely before decorating with icing or sprinkles.
Notes
- Store the cookies in an airtight container for up to one week.
- For softer cookies, reduce baking time by 1-2 minutes.
- Use gel food coloring for more vibrant colors.
- Prep Time: 20 minutes
- Cook Time: 12 minutes
- Category: Dessert
- Method: Baking
- Cuisine: Polish
Nutrition
- Serving Size: 1 cookie
- Calories: 120
- Sugar: 6g
- Sodium: 40mg
- Fat: 5g
- Saturated Fat: 3g
- Unsaturated Fat: 2g
- Trans Fat: 0g
- Carbohydrates: 16g
- Fiber: 0.5g
- Protein: 2g
- Cholesterol: 20mg
Keywords: Easter cookies, ciastka wielkanocne, holiday treats