
Nothing says Christmas like a stunning bánh noel đẹp sitting proudly on your dessert table! I still remember the first time I tried making one—it was a messy, lopsided disaster, but the joy it brought my family made me obsessed with perfecting it. Now, this cake is my go-to holiday showstopper, and trust me, it’s easier than it looks. With a soft, buttery crumb and endless decorating possibilities, it’s the perfect way to spread festive cheer. Whether you’re hosting a party or just craving a little holiday magic, this cake is guaranteed to wow everyone who sees (and tastes!) it.
Why You’ll Love This Bánh Noel Đẹp
- It’s so easy to make—no fancy skills required, just a little holiday spirit!
- The decorations make it instantly festive—perfect for wowing guests or gifting.
- Soft, buttery crumb that melts in your mouth (seriously, it’s addictive).
- Endless decorating fun—let the kids go wild with sprinkles or keep it elegant with icing.
- Smells like Christmas while baking (vanilla + butter = pure holiday magic).
- Great for parties, potlucks, or just treating yourself—because ’tis the season!
- Stays moist for days (if it lasts that long—mine never does).
Ingredients for Bánh Noel Đẹp
(Psst—grab these before you start! I promise, it’s all simple stuff you probably already have.)
- 2 cups all-purpose flour (spooned and leveled—no packing!)
- 1 cup granulated sugar (for that perfect sweetness)
- 1/2 cup unsalted butter, softened (leave it out for 30 minutes—trust me, it mixes way better)
- 3 large eggs, room temperature (cold eggs can make the batter lumpy)
- 1 teaspoon pure vanilla extract (the good stuff—it makes a difference!)
- 1 teaspoon baking powder (for that dreamy rise)
- 1/2 cup whole milk (or any milk you have, but whole makes it extra rich)
- Festive decorations—sprinkles, icing, edible glitter… go wild! (This is where the „đẹp” comes in!)
Tip: If you’re feeling fancy, add a pinch of salt to balance the sweetness. My grandma swears by it!
Equipment You’ll Need
Don’t worry—this isn’t one of those recipes that requires a million fancy gadgets. Just grab these basics (I bet you already have most of them!):
- 1 large mixing bowl (or two if you want to mix dry and wet separately—but hey, I’ve done it all in one bowl in a pinch!)
- 1 medium mixing bowl (for whisking eggs or holding decorations—optional but handy)
- 1 whisk or electric mixer (a fork works in a crisis, but trust me, your arms will thank you for using a mixer)
- 1 rubber spatula (for scraping every last bit of batter—no waste here!)
- 1 9-inch round cake pan (or a festive holiday-shaped pan if you’re feeling extra)
- Parchment paper or nonstick spray (because no one likes a cake that sticks)
- Cooling rack (unless you enjoy sweating over a hot cake—been there!)
- Decorating tools: piping bags, offset spatula, or just a butter knife and a steady hand
Pro tip: If your cake pan is looking a little sad, line the bottom with parchment paper—it’s a total game-changer for easy removal!
How to Make Bánh Noel Đẹp
Okay, let’s get baking! This is the fun part—just follow these simple steps, and you’ll have a gorgeous Christmas cake in no time. I’ve broken it down so even if you’re a beginner, you’ll feel like a pro. (And hey, if I can do it after my first lopsided disaster, so can you!)
Preparing the Batter
- Preheat your oven to 350°F (175°C). Trust me, you don’t want to forget this step—cold ovens lead to sad, flat cakes.
- Mix the dry ingredients: In a large bowl, whisk together the flour, sugar, and baking powder. (If you’re adding that pinch of salt, toss it in now!) Make sure there are no lumps—unless you’re into surprise flour pockets in your cake (no judgment).
- Cream the butter and eggs: In another bowl (or the same one if you’re lazy like me sometimes), beat the softened butter until it’s smooth and fluffy. Add the eggs one at a time, mixing well after each. Stir in the vanilla extract. Pro tip: If your butter isn’t soft enough, zap it in the microwave for 5-second bursts—just don’t let it melt!
- Combine wet and dry: Gradually add the dry ingredients to the butter mixture, alternating with the milk. Mix until just combined—overmixing makes the cake tough, and we want it light and dreamy!
Batter should be smooth and thick but pourable. If it’s too stiff, add a splash more milk. Too runny? A sprinkle of flour will fix it!
Baking the Cake
- Prep your pan: Grease your cake pan with butter or nonstick spray, then line the bottom with parchment paper. (This is my secret for never-ending cake-sticking battles.)
- Pour the batter: Transfer the batter into the pan, smoothing the top with a spatula. Tap the pan gently on the counter to release any sneaky air bubbles.
- Bake for 25–30 minutes: Pop it in the oven and resist the urge to open the door! Check at 25 minutes—if a toothpick inserted in the center comes out clean (or with a few crumbs, but no wet batter), it’s done. If not, give it another 5 minutes.
- Cool it down: Let the cake cool in the pan for 10 minutes, then transfer it to a wire rack. Do not skip this step! Decorating a warm cake is like trying to frost a snowman in the sun—messy and sad.
Golden-brown edges and a springy top mean perfection. If the top browns too fast, tent it with foil.
Decorating Your Bánh Noel Đẹp
Now for the best part—making it look as amazing as it tastes! Here’s where you can go wild:
- Simple icing: Mix powdered sugar with a splash of milk or lemon juice for a quick glaze. Drizzle it over the cake and add sprinkles immediately (before it sets!).
- Festive piping: Use a piping bag to write „Merry Christmas” or draw snowflakes. No piping bag? A zip-top bag with a tiny corner cut off works in a pinch!
- Edible bling: Think crushed candy canes, gold dust, or even fresh berries for a pop of color. My kids love arranging M&Ms in holiday patterns.
- Personal touch: Add a mini Santa figurine, a dusting of „snow” (coconut flakes!), or a chocolate tree. There are no rules—just have fun!
Tip: If your cake domed a bit, just slice off the top to make it flat before decorating. (And hey, chef’s snack!)
Tips for the Perfect Bánh Noel Đẹp
Listen, I’ve had my fair share of cake fails (who hasn’t?), so I’m sharing all my hard-earned secrets to help you nail this every single time. These little tricks make all the difference between “meh” and “WOW!”—take it from someone who’s learned the hard way!
- Room temp is your BFF: Cold butter and eggs don’t mix well—they make the batter lumpy. Leave them out for 30 minutes before starting. (If you forget, place eggs in warm water for 5 minutes and microwave butter in 5-second bursts—just don’t melt it!)
- Measure flour right: Spoon flour into your measuring cup and level it off. Packing it down = dense cake, and nobody wants that.
- Mix gently: Once you add flour, mix until just combined. Overmixing = tough cake, and we’re going for cloud-like fluffiness here.
- Pan prep matters: Grease AND line your pan with parchment. It’s the only way to guarantee your cake won’t stick (and yes, I’ve cried over stuck cakes before).
- Spread batter evenly: Use a spatula to smooth the top before baking. Lopsided batter = lopsided cake (ask me how I know).
- Cool completely: I know it’s tempting, but decorating a warm cake is a sticky disaster. Patience pays off!
- Toothpick trick: If the toothpick comes out with wet batter, bake longer. If it’s clean or has a few crumbs, it’s done. No guessing!
- Hide imperfections: Cracked top? No problem—cover it with sprinkles or a thick layer of icing. I call this “strategic decorating.”
- Fresh decorations: Add sprinkles or fresh fruit right before serving to keep colors vibrant (soggy sprinkles are sad sprinkles).
- Taste as you go: Sneak a bite of the batter (I won’t tell)—if it tastes good raw, it’ll taste amazing baked!
Bonus tip: If your cake sticks anyway, patch it up with extra frosting and call it “rustic charm.” Works every time!
Variations for Bánh Noel Đẹp
Okay, here’s where things get really fun! The beauty of this cake is how easy it is to customize—whether you want to switch up the flavors, make it allergy-friendly, or just use what’s in your pantry. Here are my favorite twists (because who says you can’t play with your food?):
- Chocolate lover’s dream: Swap 1/4 cup of the flour for cocoa powder and fold in chocolate chips. Instant holiday magic!
- Citrus sparkle: Add the zest of 1 orange or lemon to the batter for a bright, festive zing. (Bonus: drizzle with citrus glaze!)
- Spiced holiday: Mix in 1 tsp cinnamon + 1/2 tsp nutmeg—it’ll smell like Christmas morning in your kitchen.
- Almond joy: Replace 1 tsp vanilla with almond extract and top with toasted almonds. So fancy, so easy.
- Gluten-free: Use a 1:1 gluten-free flour blend (I love Bob’s Red Mill). Just don’t overmix—GF batter needs extra TLC.
- Dairy-free: Swap butter for coconut oil and use almond milk. Works like a charm!
- Egg-free: Try flax eggs (1 tbsp ground flax + 3 tbsp water per egg). Not quite as fluffy, but still delish.
- Fruity twist: Fold in 1/2 cup dried cranberries or chopped cherries for pops of color and tartness.
- Nutty crunch: Stir 1/2 cup chopped pecans or walnuts into the batter—great texture contrast!
- Candy cane crush: Mix crushed candy canes into the batter or sprinkle on top for a peppermint punch.
Pro tip: If you’re experimenting, write down what you change! My “brilliant” vanilla-lavender combo last year? Let’s just say… some ideas should stay ideas.
Serving and Storing Bánh Noel Đẹp
Alright, you’ve baked and decorated your masterpiece—now let’s talk about keeping it fresh and fabulous! Whether you’re serving it right away or saving some for later (if there’s any left—good luck with that!), here’s everything you need to know:
- Serving tip #1: Let the cake sit at room temperature for 30 minutes before slicing. Cold cake hides all that buttery flavor—trust me, it tastes 10x better when it’s not fridge-cold!
- Serving tip #2: Use a sharp knife dipped in hot water (and dried) for clean slices. No more crumbly messes—just picture-perfect pieces.
- Room temp storage: If eating within 2 days, cover it loosely with foil or a cake dome. No need to refrigerate unless your kitchen is super warm.
- Fridge storage: Pop it in an airtight container and it’ll stay fresh for up to 5 days. (But really, will it last that long? Mine never does.)
- Freezing hack: Wrap individual slices tightly in plastic wrap, then foil. Freeze for up to 2 months. Thaw overnight in the fridge—or heck, eat it semi-frozen like my kids do!
- Reviving leftovers: If the cake dries out (how?!), microwave a slice for 10 seconds with a damp paper towel on top. Instant moisture boost!
- Decoration TLC: If using fresh fruit or whipped cream, add it right before serving. Nobody likes a sad, wilted berry on their cake.
Secret confession: I’ve been known to “accidentally” leave the cake out overnight just so I can sneak a midnight slice. No regrets.
Nutritional Information
Okay, let’s be real—this cake is meant to be enjoyed, not stressed over! But if you’re curious (or just keeping track), here’s the *rough* nutritional breakdown per slice. (Disclaimer: These numbers can vary based on your exact ingredients and how generous you are with the icing—no judgment here!)
- Serving size: 1 slice (about 1/12th of the cake)
- Calories: ~250 (worth every single one!)
- Total fat: 10g (mostly from that glorious butter)
- Saturated fat: 6g (it’s the holidays—live a little!)
- Carbohydrates: 35g (aka the fuel for your festive joy)
- Sugar: 15g (because what’s Christmas without a little sweetness?)
- Protein: 4g (eggs for the win!)
- Cholesterol: 60mg
- Sodium: 100mg (unless you added that pinch of salt—then maybe 110mg)
Note: Using low-fat ingredients? Your numbers will be different. Decorated like a snow globe with extra icing? Yeah, we’re not counting those sprinkles—’tis the season!
Frequently Asked Questions
Can I freeze this bánh noel đẹp?
Absolutely! Wrap the whole cake (or individual slices) tightly in plastic wrap, then foil. Freeze for up to 2 months. Thaw overnight in the fridge—or if you’re impatient like me, microwave a slice for 15 seconds. It’ll taste just as festive!
How do I prevent my cake from drying out?
Two secrets: 1) Don’t overbake it—the toothpick should have a few crumbs, not be bone-dry. 2) Store it properly (airtight container at room temp or in the fridge). If all else fails, brush cooled cake with simple syrup before decorating—it’s a baker’s magic trick!
Can I make this cake ahead of time?
Yes! Bake it 1-2 days before and store undecorated at room temp. Decorate the day of serving so your icing stays fresh and your sprinkles stay crunchy. The flavors actually get better after a day—like holiday magic marinating!
My cake sank in the middle—what went wrong?
Oh no! Usually means: 1) Opened the oven door too early (resist the peek!), 2) Underbaked (toothpick test is your BFF), or 3) Overmixed the batter. But hey—pile on extra frosting and call it a “well” for candy! No one will know.
Any easy decorating ideas for beginners?
Start simple: Dust with powdered sugar through a stencil (cut a snowflake from paper), drizzle with melted chocolate, or press sprinkles onto the sides. My first “fancy” cake was just white icing with red sprinkles—looked like Santa’s workshop and took 2 minutes!

Zachwycający tort Noël w 5 prostych krokach
- Total Time: 45 mins
- Yield: 1 cake 1x
- Diet: Vegetarian
Description
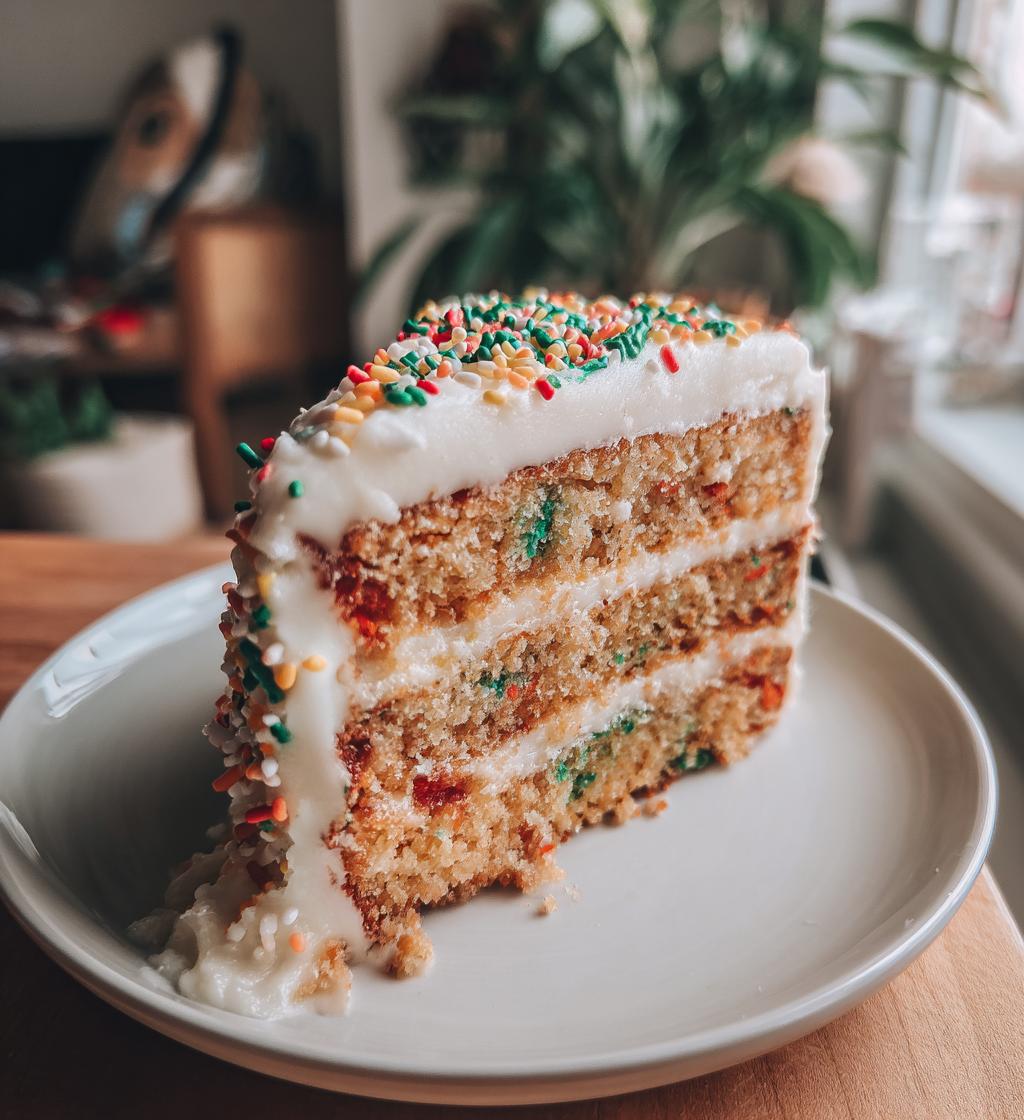
Beautiful Christmas cake with festive decorations.
Ingredients
- 2 cups all-purpose flour
- 1 cup sugar
- 1/2 cup butter
- 3 eggs
- 1 tsp vanilla extract
- 1 tsp baking powder
- 1/2 cup milk
- Festive decorations (sprinkles, icing, etc.)
Instructions
- Preheat your oven to 350°F (175°C).
- Mix flour, sugar, and baking powder in a bowl.
- Add butter, eggs, vanilla, and milk. Stir until smooth.
- Pour batter into a greased cake pan.
- Bake for 25-30 minutes or until a toothpick comes out clean.
- Let the cake cool before decorating.
- Add festive decorations as desired.
Notes
- Use room-temperature ingredients for better mixing.
- Adjust baking time based on your oven.
- Store in an airtight container to keep it fresh.
- Prep Time: 15 mins
- Cook Time: 30 mins
- Category: Dessert
- Method: Baking
- Cuisine: International
Nutrition
- Serving Size: 1 slice
- Calories: 250
- Sugar: 15g
- Sodium: 100mg
- Fat: 10g
- Saturated Fat: 6g
- Unsaturated Fat: 3g
- Trans Fat: 0g
- Carbohydrates: 35g
- Fiber: 1g
- Protein: 4g
- Cholesterol: 60mg
Keywords: Christmas cake, festive dessert, holiday baking